Pro Tip: These will have visible hoses running directly up to the faucet’s base.

Grab the new escutcheon and under cover plate.
Tighten the sprayer, then remove the clip from your faucet hose.
Double-check under the sink to make sure all stays dry.

Use These Materials For Installation Of The Kitchen Faucet

- New / replacement kitchen faucet
- Crescent wrench
- Screwdriver
- Old towels (optional but recommended)
The Step by Step For Installing a New Kitchen Faucet
Under the sink, slide the weight onto the faucet hose.
Step One: Turn off water
You’ll notice Hot and Cold hoses coming out of your faucet.

Turn on your faucet to make sure it works.
Step Two: Drain the lines

Pro Tip: The tabs on the escutcheon should line up with slots on the bottom of the faucet hub.
Grab the new faucet and carefully thread the hoses down through the escutcheon and center sink hole.
Step Three: Check for the escutcheon

Pull the kitchen faucet and all of its connected pipes, tubes, hoses, whatever, up and out of the sink holes.
Check under the sink for leaks.
Step Four: Disconnect hoses
Pro Tip: Some faucets may have additional-length hoses that connect the faucet to the water source; some faucets may have hoses that are long enough to connect themselves.
Use a screwdriver to lighten the locking screws.
Run the faucet for a minute or two to flush out any debris.

Gently pull the faucet hose a bit to make sure it’s connected securely.
Either way, disconnect them all.
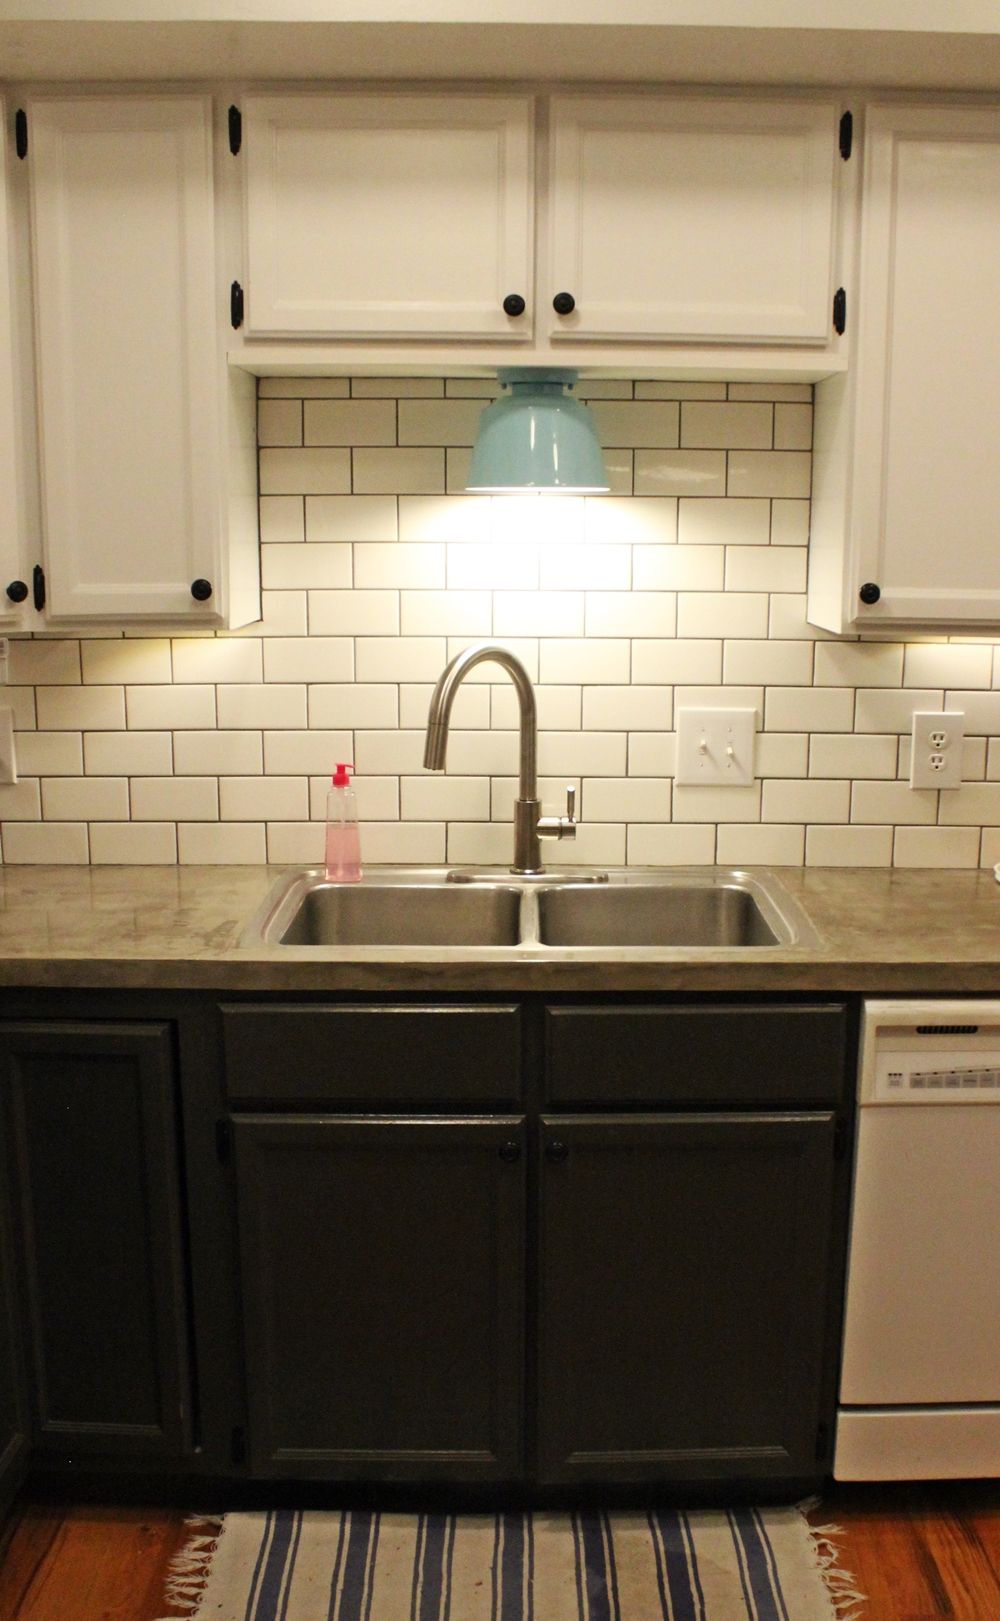
A new kitchen faucet can do wonders in making any kitchen feel updated. The scale of this particular faucet – its height in relation to the sink and in proximity to the over-sink light – lends a sense of presence.
To replace a kitchen faucet, you’ll want to clean out your sink first. Then, turn off the water and disconnect the hose. Loosen the nut under the faucet. Clean the sink holes. Once this prep is done, you’ll follow along the step-by-step guide laid out in this post to install the kitchen faucet.
Place sprayer back up next to faucet spout.
Step Five: Remove weight


Push hoses all the way down.
Remove the weight from the hose.
Step Six: Take out faucet
Everything is disconnected at this point – the two escutcheon mounting bolts, the water hoses, and the faucet mount.

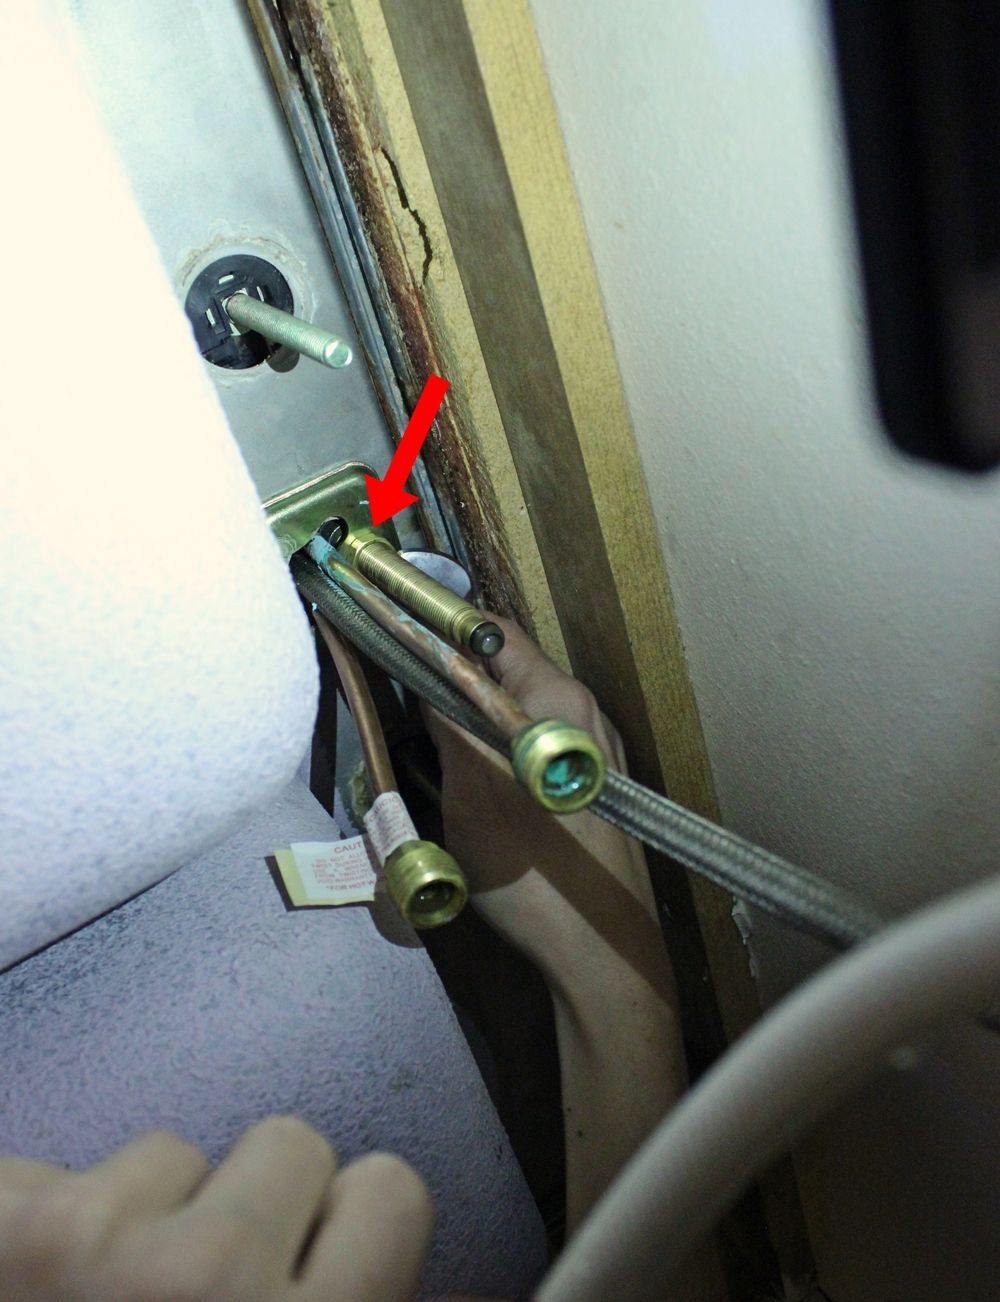
Since your water is now turned off, you have no need for the hoses up to your faucet. Disconnect these (red arrows in the photo).

Step Seven: Clean any grime
These need to be connected to the Hot and Cold water sources under your sink.
Attach the end of the faucet hose to the faucet outlet (right up under the faucet shank) with a clip or other attachment provided with the new faucet.
You can clean a kitchen faucet head with a 2:1 mixture of baking soda and vinegar. Place this mixture in a baggy. Put the baggy over the kitchen faucet head. Let it fizz up for 30 minutes. Remove. Wash with warm water. Dry with a microfiber cloth.

Step Eight: Install new escutcheon plate
Make sure the faucet hose is still secured (generally with a plastic clip) up on the sink side so the hose doesn’t get pulled through the faucet during the next step.


The water source that is connected to your dishwasher is the Hot line; the other is the Cold.

Step Nine: Install new fixture
There you have it: The process for installing a kitchen faucet. As we told you, it wasn’t as hard as it looked! Now it’s your turn to go out and get your new kitchen faucet placed. We wish you luck and hope this was a helpful guide.

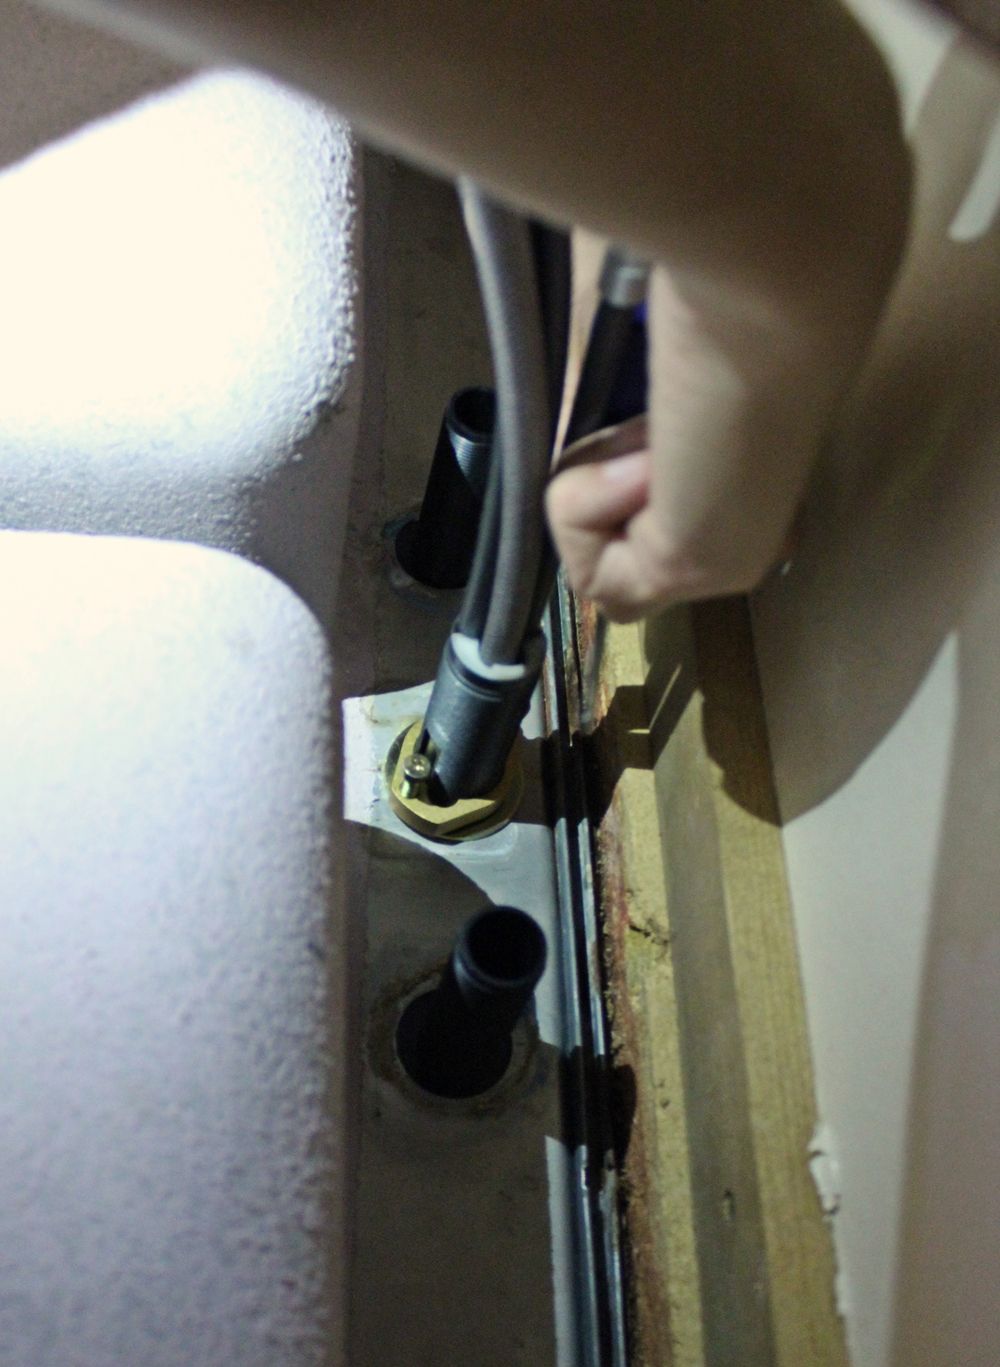
Reach up under the faucet and unscrew and remove the two mounting nuts from the two mounting bolts/shanks.
Step Ten: Line it up
It’s now time to install the hose weight.
The post How To Install A Kitchen Faucet appeared first on Homedit.

Use a crescent wrench to unscrew the nut from the faucet-mounting bolt.
To remove a kitchen faucet, you need to turn off the water, disconnect the hose, loosen the nuts under the faucet, and pull it out.
If your faucet has an escutcheon (the “optional” 10-inch mounting plate that rests under the base of the faucet shank), you’ll need to loosen this.
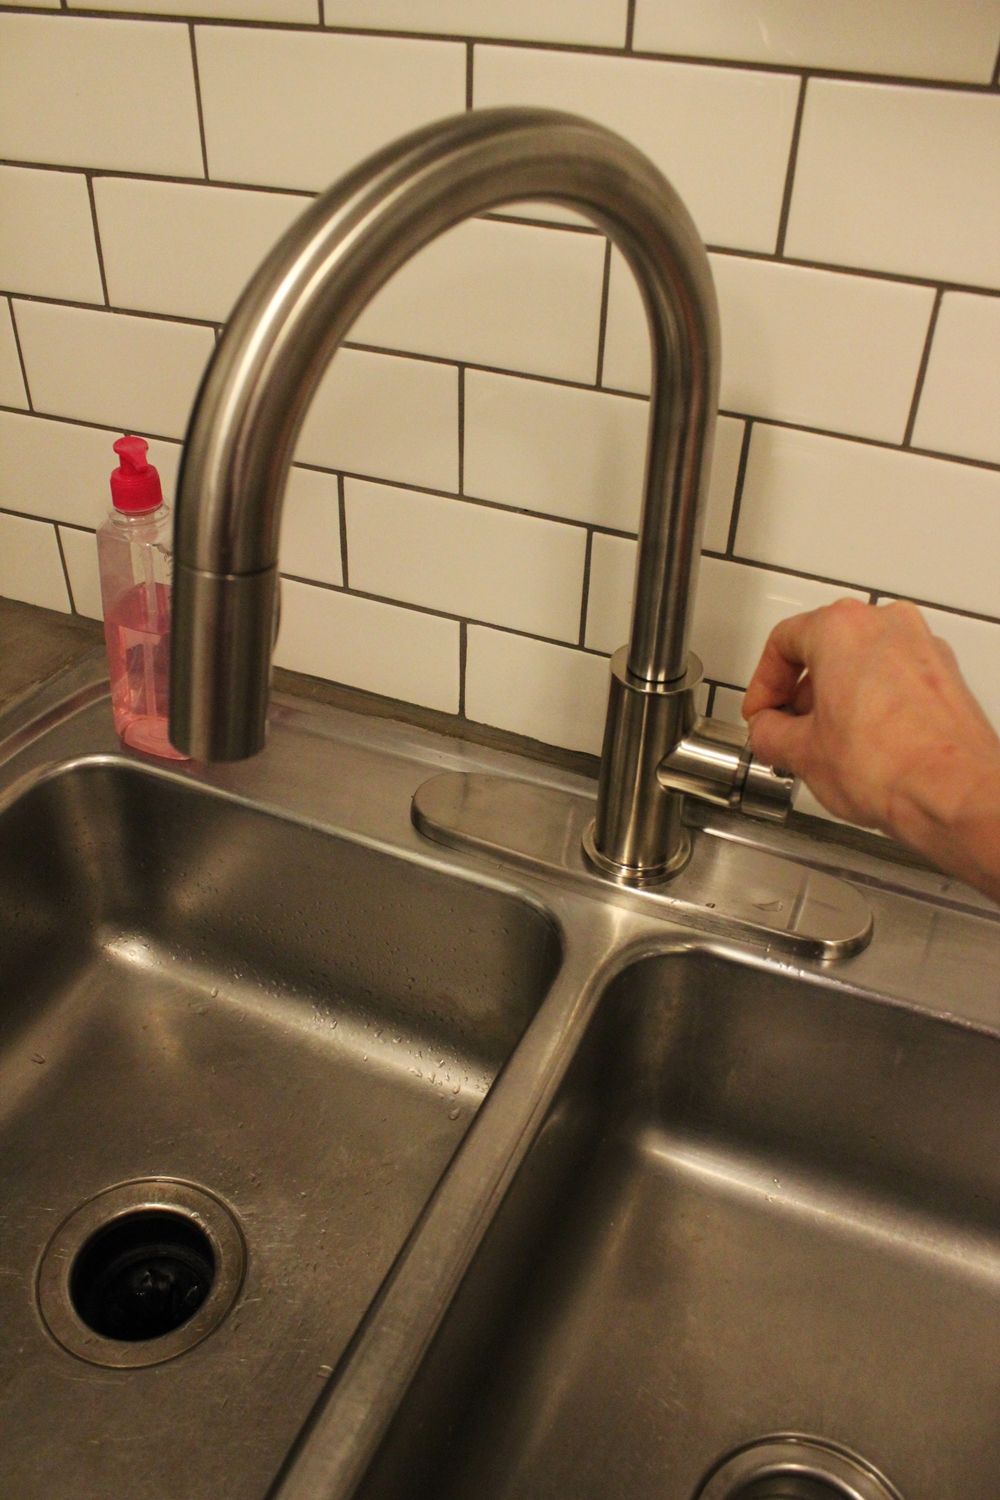
Step Eleven: Tighten mounting nuts
To begin, after you’ve cleaned out under your kitchen sink, you’ll need to turn off the water to your faucet.
Step Twelve: Attach hose weight
It’s time to re-hook up the water.
Pro Tip: If you choose to use an S.O.S. scouring pad, be careful not to scrape your sink’s surface too much.
The best kitchen faucets are always changing, to find the best ones, you should consult monthly roundup guides on consumer reviews. That said, Moen, Delta, and Kraus are well-known brands that do rank. If you find one be sure to read through their manuals or online for installing a Delta kitchen faucet, a Moen kitchen faucet installation.
After you’ve turned off both water sources, turn the faucet on.
Step Thirteen: Attach to outlet
Place, then tighten with your hands, the two mounting nuts onto the under cover plate’s shanks to hold the escutcheon in place.


Step Fourteen: Hook up water


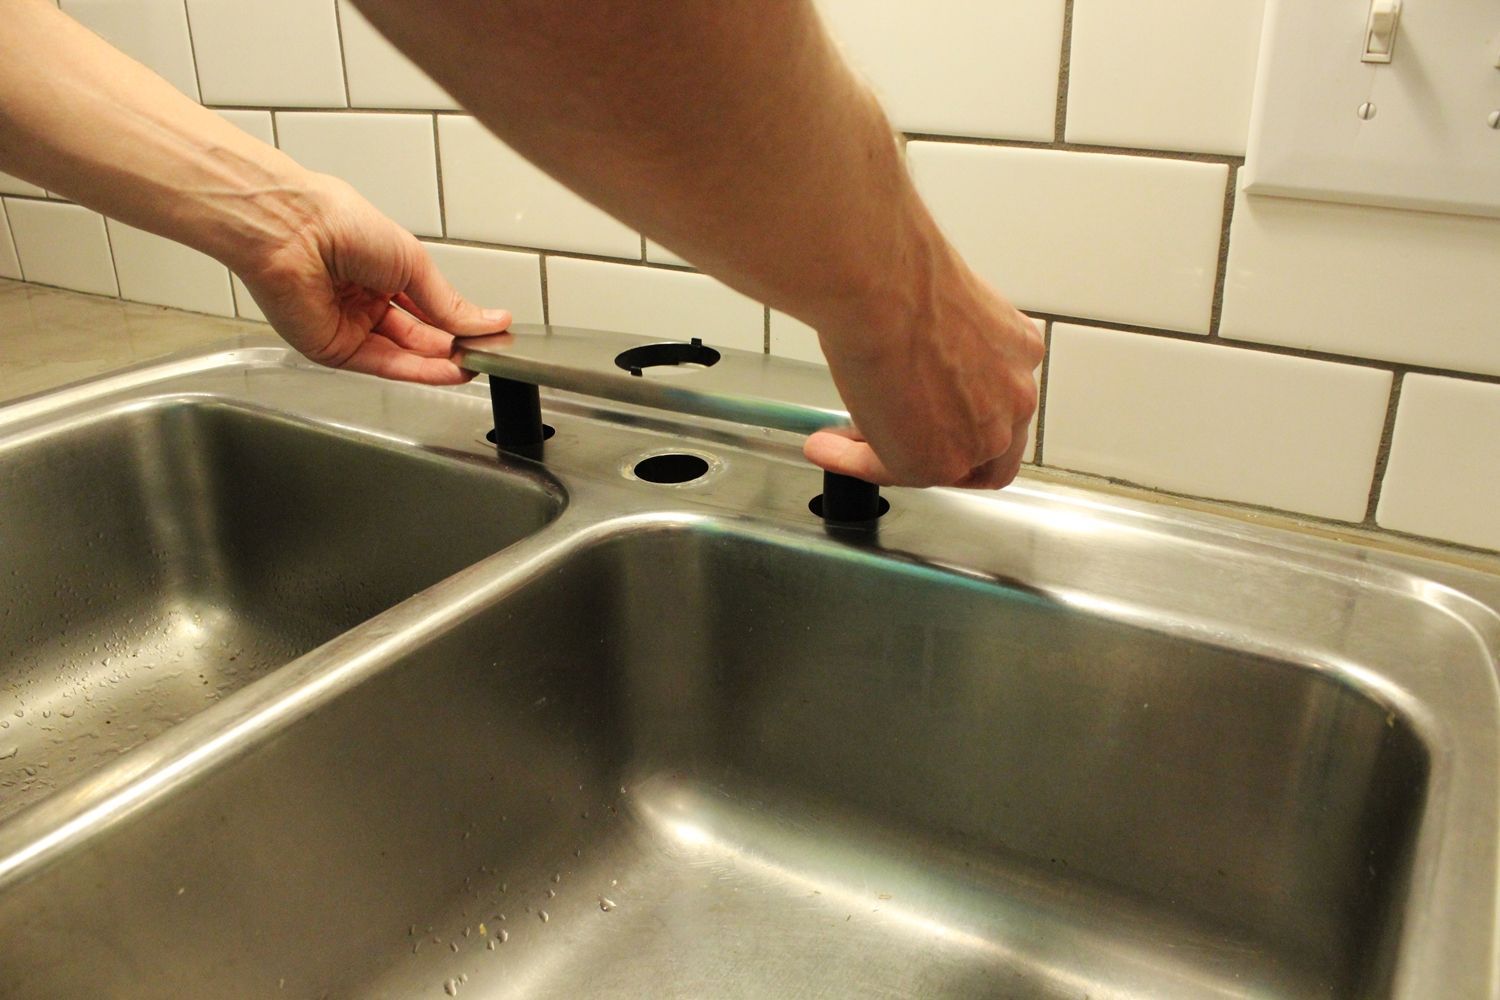
Place the escutcheon and under cover plate onto sink-top, with plate shanks going through the sink holes.
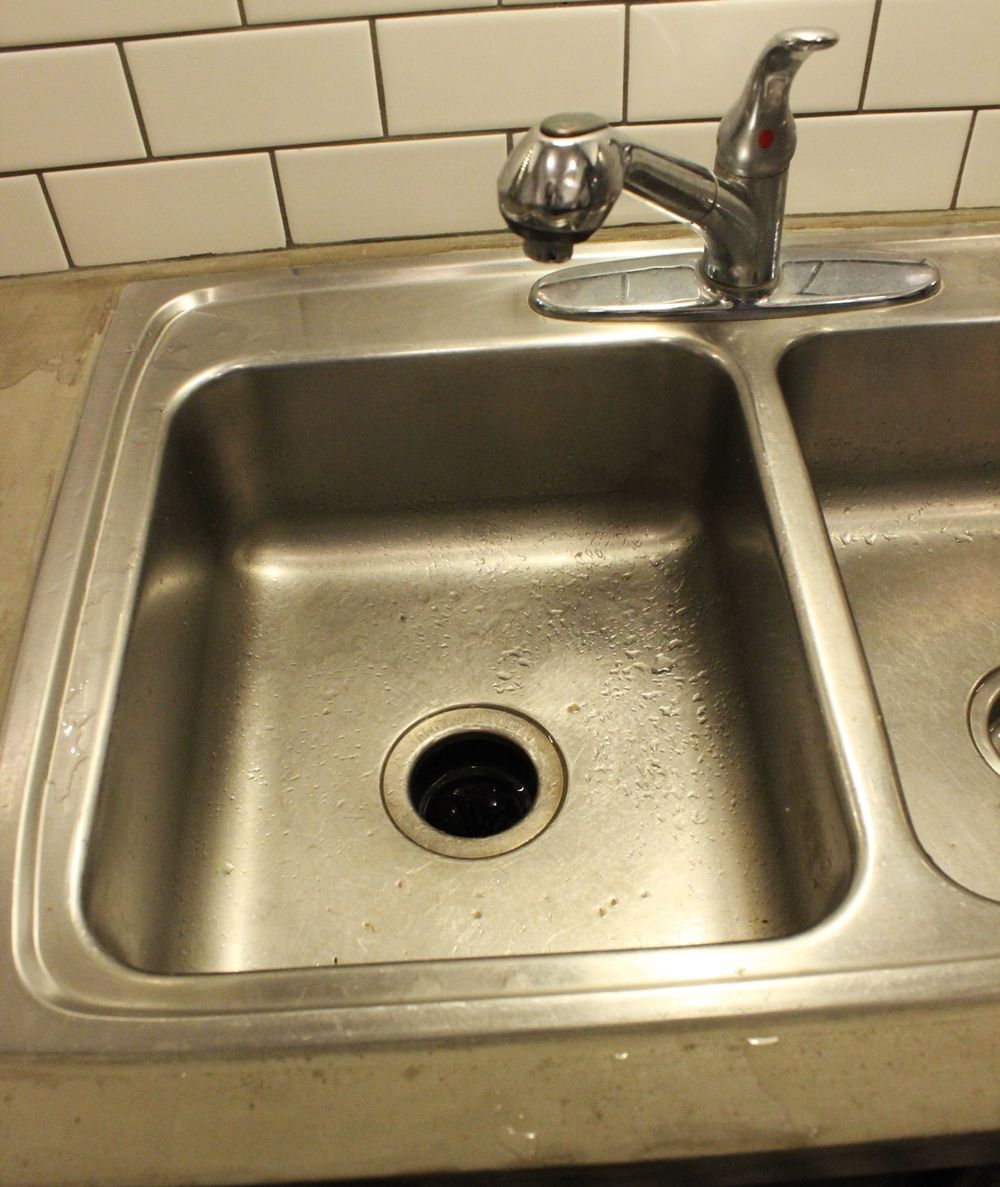
With everything disconnected, it’s time to remove your old faucet from its place in the sink.


Attach the appropriate hoses to the water sources – hot to hot, cold to cold.


Step Fifteen: Turn on the water

Clean the sink-top around the faucet holes and edge of old escutcheon plate.
Use a crescent wrench to tighten connection, but don’t overtighten.
To fix a leaky kitchen faucet, you’ll first have to identify which faucet type you have. Once you do that, you find case-specific instructions to ensure the best results on your faucet.
Step Sixteen: Attach sprayer
Attach them together. They won’t snap together, but they should fit snugly.

The last step to installing the new kitchen faucet is to attach the sprayer to the faucet hose.


Also, disconnect the faucet outlet hose from the faucet-mounting bolt (blue arrow in the photo).
Step Seventeen: Check for leaks
To install a kitchen faucet, you’ll want to clear out your space and sink first. Then, turn off the water and disconnect the hose. Loosen the nut under the faucet. Clean the sink holes. Once this prep is done, you’ll follow along the step-by-step guide laid out in this post to install tthe kitchen faucet.
Have someone hold the faucet in place up above while you head under the sink and place, then tighten by hand, the brass mounting nut and washer onto the new faucet shank.
Turn off the Hot and Cold water sources.
A little residual water may run out, but then it should be dry.
Do you want to learn how to install a kitchen faucet yourself? Plumbing repairs in any form can be a scary idea. But upgrading your kitchen faucet is not as difficult as it might seem.
Frequently Asked Questions (FAQ)FAQ
How to replace kitchen faucet?

How to install a kitchen faucet?
Use a screwdriver to loosen the weight from the faucet hose.
How to remove the kitchen faucet?

How to fix a leaky kitchen faucet?
Line up the hub of the faucet onto the escutcheon.
What are the best kitchen faucets?

How to clean a kitchen faucet head?

Kitchen Faucet Installation: Conclusion
Installing kitchen faucets are relatively simple once you have the right process and materials in place.
Be sure to check out other tutorials in our DIY Kitchen Upgrade Series:
- DIY Faux Concrete Countertops
- Upgrade Your Kitchen Lighting
- USB Charger/Electrical Outlet
- Remove Kitchen Tile Backsplash
- Subway Tile Kitchen Backsplash

We’ll show you exactly how to install a kitchen faucet with this easy tutorial.
