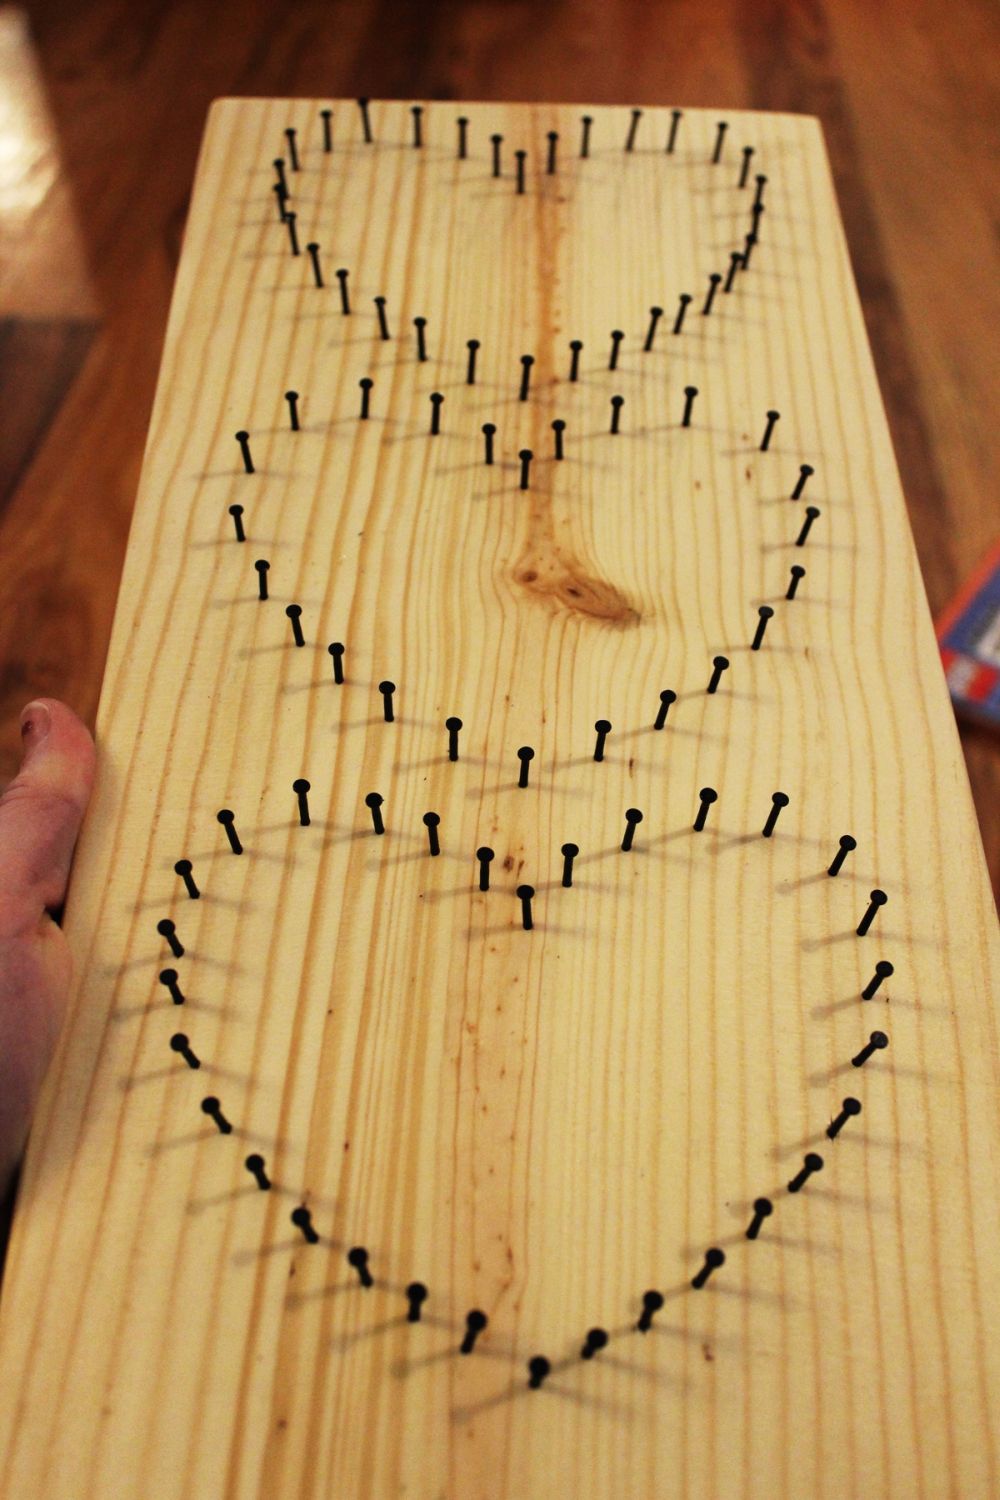
Lay your heart template onto your board, directly in the center. (I recommend measuring for best results, but you’re free to be as risky as you want.) Take a pencil and mark every 1/2″ to 3/4″ along the outside of your heart. Each dot you make with the pencil represents a place you’ll hammer in a nail, so keep this in mind. Try to maintain even spacing all the way around. Repeat for all three hearts.
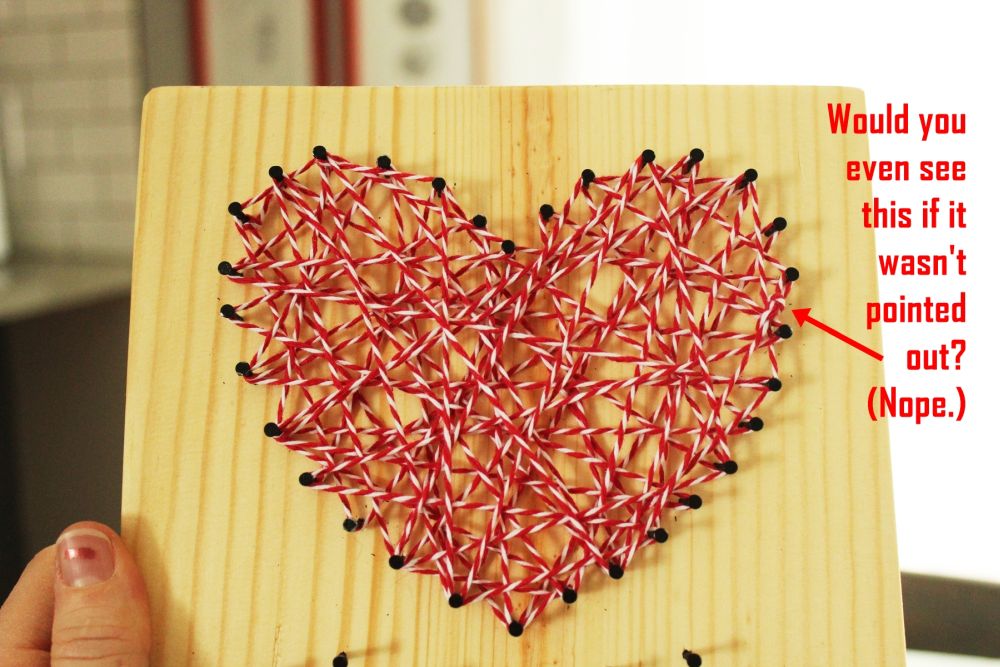
Remember the knot we started with on the first red heart? It’s hardly noticeable now.
I love how simple and fast this DIY project is. Other than the board prep drying time, it really can be done in about an hour or less.
Heart String Art DIY Level: Beginner
The post DIY Baker’s Twine Heart String Art appeared first on Homedit.
Materials you’ll needed for the Heart String Art:
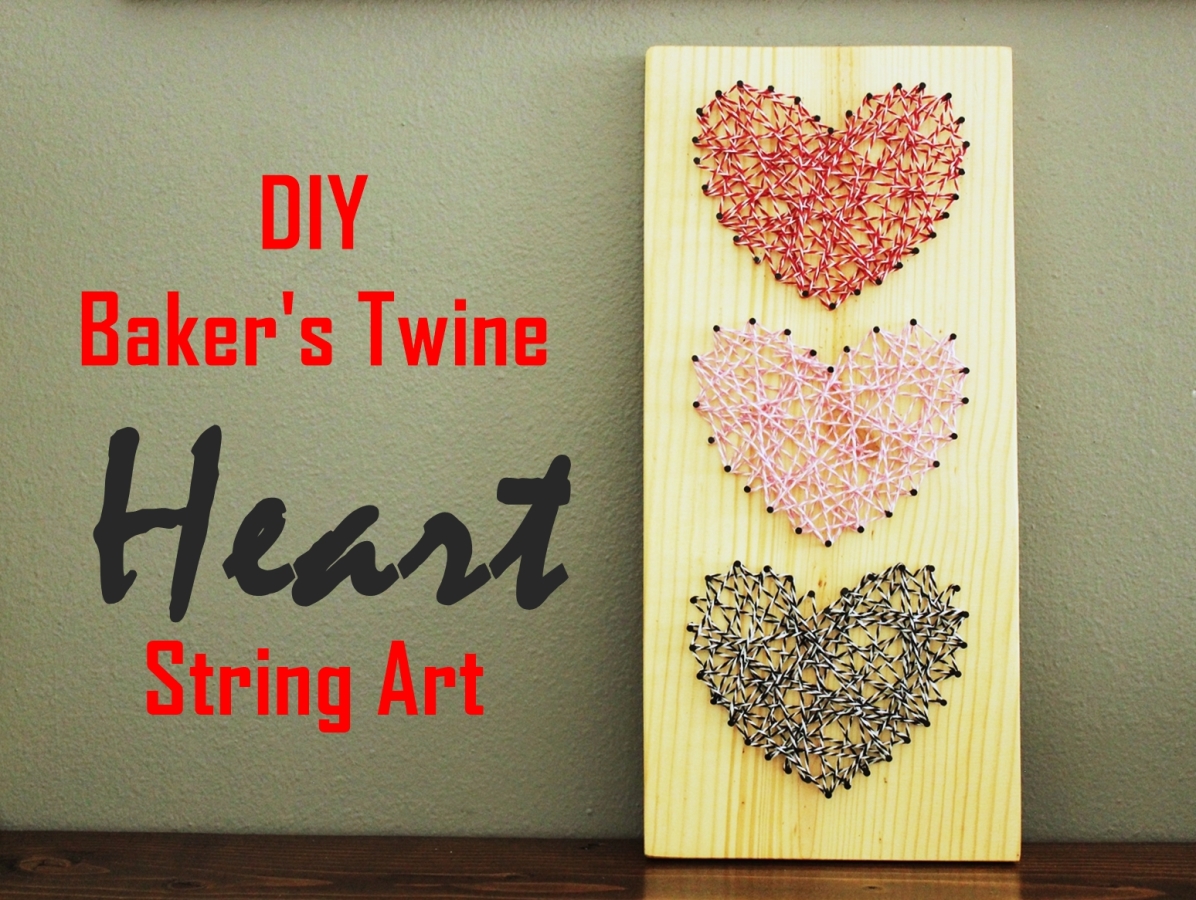
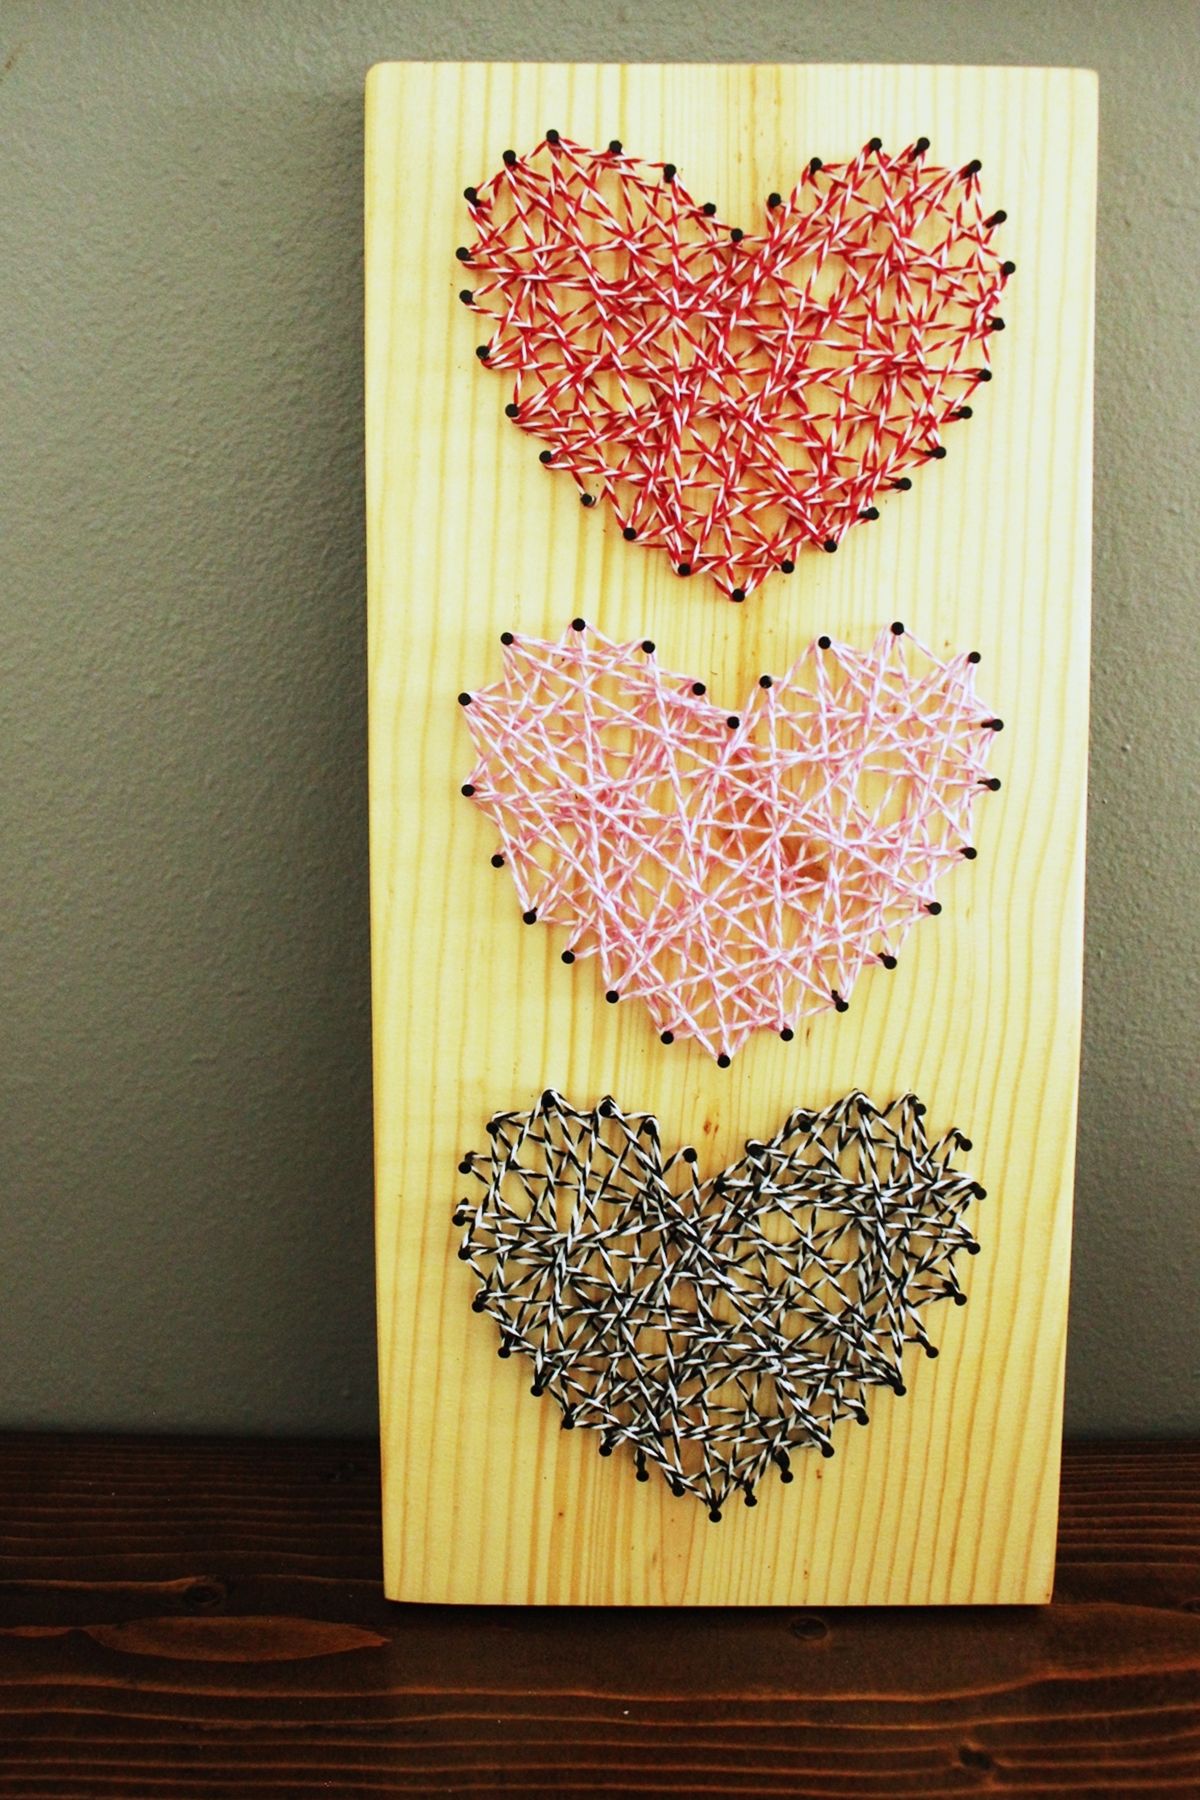
- Baker’s twine in red-white, pink-white, and black-white
- 1” thick board, cut to the size of your choice (example uses about 8” x 18”)
- Sandpaper, 120-grit
- Stain, polyurethane, or paint of your choice
- 1” nails + hammer
- Scratch paper + scissors to for your heart template
How to craft the Heart String Art:

Step 1: Sanding the wood


Begin by preparing your board. Sand with a mid-range sandpaper (I used 120-grit) – Sanding tool.
Step 2: Apply the finish coat
When you’re done stringing your heart, measure then tie a loop at the end of your baker’s twine.

Step 3: Prepare the folding paper pattern
Place the loop over one of your nails of that color’s heart. (Any nail will do; there’s no rhyme or reason.) Pull the knot tight; double knot it if you want.

Apply the poly (or whatever your finish of choice is), then let it completely dry.
Can you find the knots on this black heart?
Step 4: Drawing


Open up your scratch paper. If the heart looks good, then use it. If you want to modify anything, close it back up and trim it down or reshape it until you have a heart that (a) looks good, and (b) fits x3 onto your board.
Step 5: Nailing process
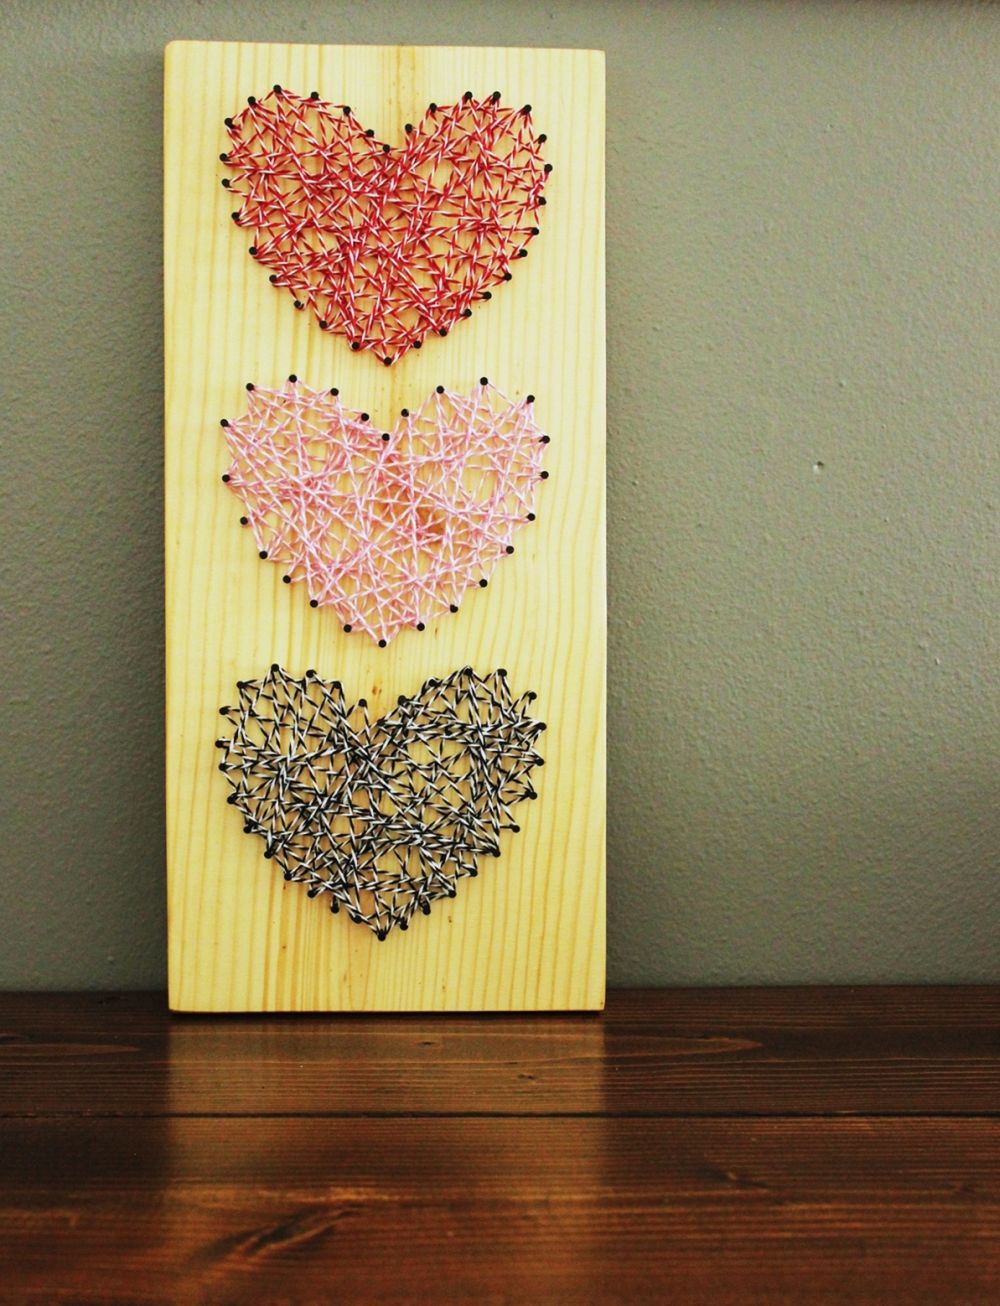
Keep going on all three hearts. As you can see, I kept the bolder colors separated with the softer pink baker’s twine in the middle.

Trim any excess string so it’s about 1/2″ long again.
Step 6: Start with your favourite color

Cut out a heart from your scratch paper by folding the paper in half and cutting an “ear” shape. (I know you probably know how to cut a heart, but just in case someone out there isn’t completely sure…)


Pulling the string taut, loop the end onto a nail.
This will look amazing in your home, but I think it would also make a wonderful gift for someone. You should probably make two, actually, because it’ll be hard to give it away when you’re done.
Step 7: Stringing process
Repeat the process for all three hearts, until your three hearts are perfectly outlined by your line of nails. Next is the fun part!

Hammer in a nail on each pencil mark. Focus on keeping the nails perpendicular (straight up-and-down) and also evenly deep around the heart.


Now grab your nails; it’s time to get them going.


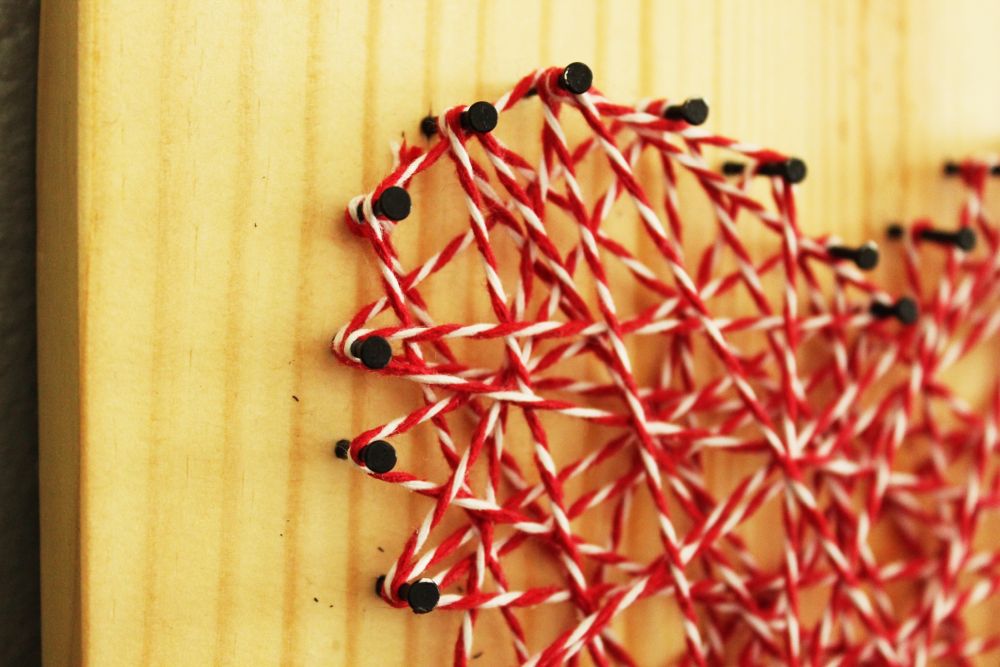
Now start stringing your heart. You can do this randomly, but try to keep in mind a few things: (1) you want string on every nail, at least once, but probably not more than three loops per nail for this size of project; (2) try to vary your angles and string distances as you string it; (3) keep some strings running around the edge(ish) of your heart rather than always going clear across the heart, because this will help your heart to appear more solid in the end.

It’s DIY string art time, friends! There’s something so therapeutic about string art, I just love doing it. And when you get a great piece of Valentine’s Day décor as an end result, that’s a major bonus. Often, string art involves a solid color of string, but in this project, we’re using three different colors of baker’s twine for a speckled, almost ombre (but not quite) effect. My household loves the end result; I hope you love yours, too.

Tuck the excess under some other running strings to hide it.
Now finish the board however you’d like. I wanted something light and fresh, so I opted for just a clear polyurethane coat on this board. However, you could stain, paint, or do any number of finishes however you’d like.


Trim the excess string so there’s only about 1/2″ left on the cut side.
This is especially the case when baker’s twine is used, because it adds another level of visual layer, with the color+white string. I especially like throwing some black in with Valentine’s Day décor. Keeps things from feeling a little too saccharine.
And the pink knot is hard to find, as well.
It might not feel like the knot is hiding, when you’re up close and personal and trying to hide it. But when you take a step back, you’ll see that it really doesn’t stand out. It’s hardly noticeable, in fact.
Black nails will stand out more, especially on a lighter finish. Gold nails might be a fun, more subtle/soft touch for Valentine’s Day, if you’re so inclined.
Choose which color of baker’s twine you want on each heart. Tie a loop at the end of your first color of baker’s twine.
It’s a good idea to aim for two loops around each nail. Some nails may get hit once, some three times, but in general, two passes seemed to work well for this size of heart.

Happy Valentine’s DIY-day!