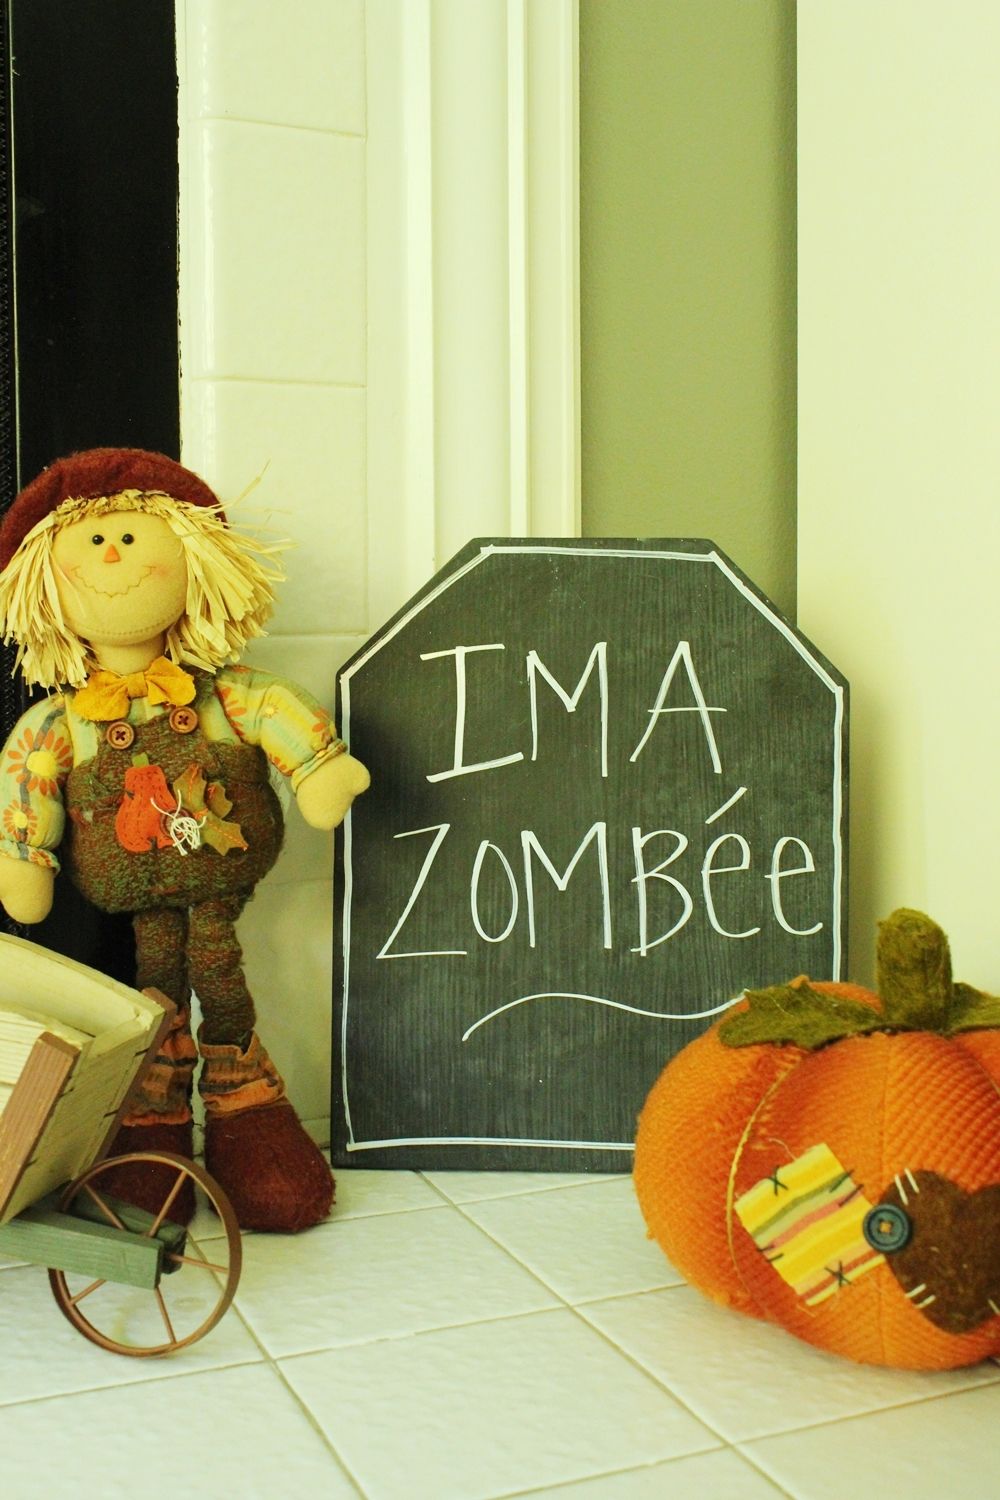
Coming up with clever tombstone names is kind of entertaining, really.

DIY Level: Beginner

Materials You’ll need for Halloween Chalkboard Tombstone:
- Plywood slab of your choice and size (shown is 1/2″ thick)
- Miter saw
- Ruler
- Fine grit sandpaper
- Primer
- Chalkboard paint
- Chalk markers
Ah, yes. Ms. Zombée was a favorite.
Step One: Measure

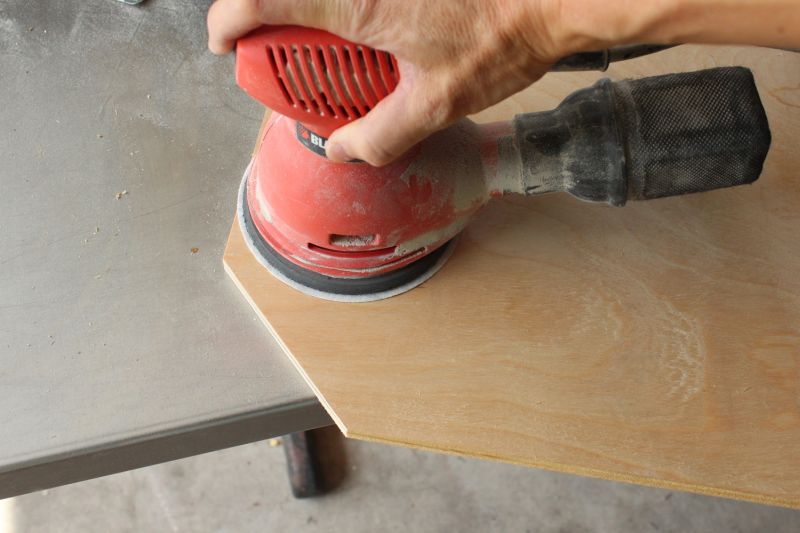
Sand the face and sides of your tombstone with medium to fine sandpaper (example uses 120-grit).
Step Two: Cut


Step Three: Sand
Use a foam roller or paintbrush to apply the chalkboard paint.
The post DIY Halloween Chalkboard Tombstone appeared first on Homedit.

Step Four: Prime
Don’t be alarmed by the bluish tones of your chalkboard paint; when the paint dries, it will dry black.
This is a fast and very easy DIY project that can help you decorate for the Halloween season in a pinch. It’s a simple process, which is every DIYer’s dream come true.
Your DIY chalkboard tombstone(s) can be used for indoor or outdoor decorations; just be sure they are protected from the elements if placed outside. A covered porch would work best.
Step Five: Sand again


Step Six: Paint
Stir your chalkboard paint completely so that it’s smooth.
When your chalkboard paint has dried completely (follow the directions on your paint can), it’s time to season it. If you were to start writing with chalk on it at this point, the chalk would likely never come all the way off; it would be there in the white shadows for the rest of your chalkboard’s existence. Seasoning your chalkboard is easy and will take just a minute or two.
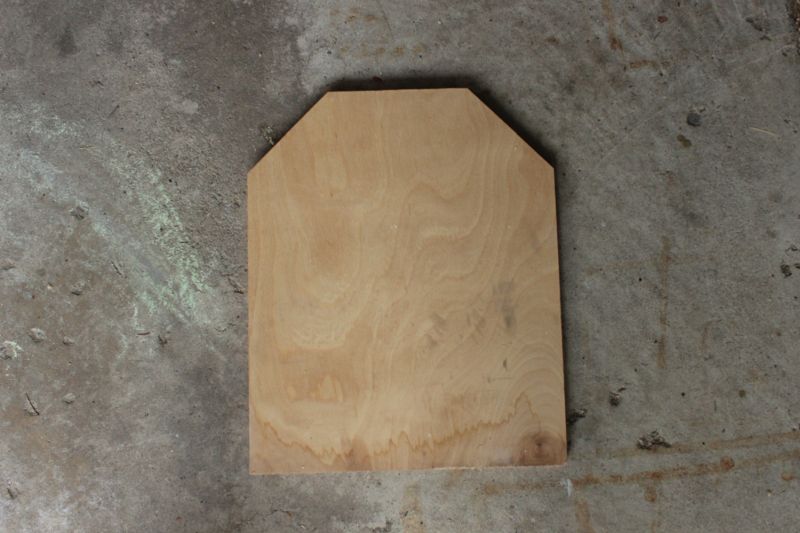
Use your miter saw, set at 45 degrees, to chop off the corners.
Lightly sand your dried primer with fine sandpaper, such as 220-grit.


Step Seven: Let dry
Don’t worry too much about the sides being perfect; it is plywood, after all. Just be sure they’re smooth.
Make sure the tombstone has a silhouette you like; modify as needed.
Step Eight: Season


Plus, you can customize the RIP messages to your heart’s content…or leave one on there for the whole month. Who doesn’t love a DIY project that’s both festive and convenient? Let’s get to it.
Let the paint dry completely. Lightly sand with fine-grit (220) sandpaper and recoat, if desired.
Slather some primer on the front face and sides of your tombstone.
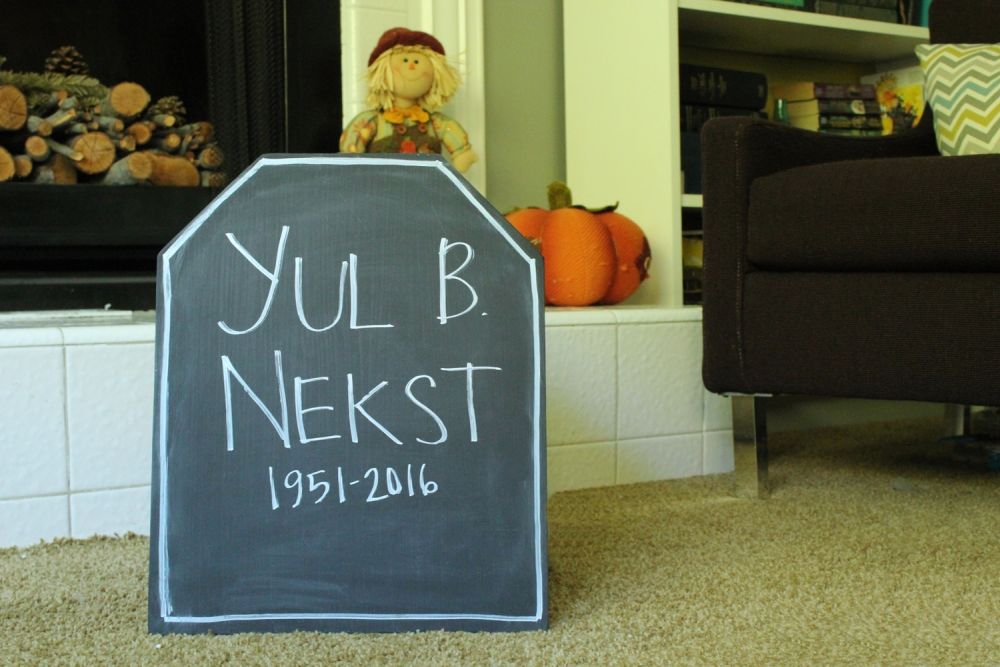
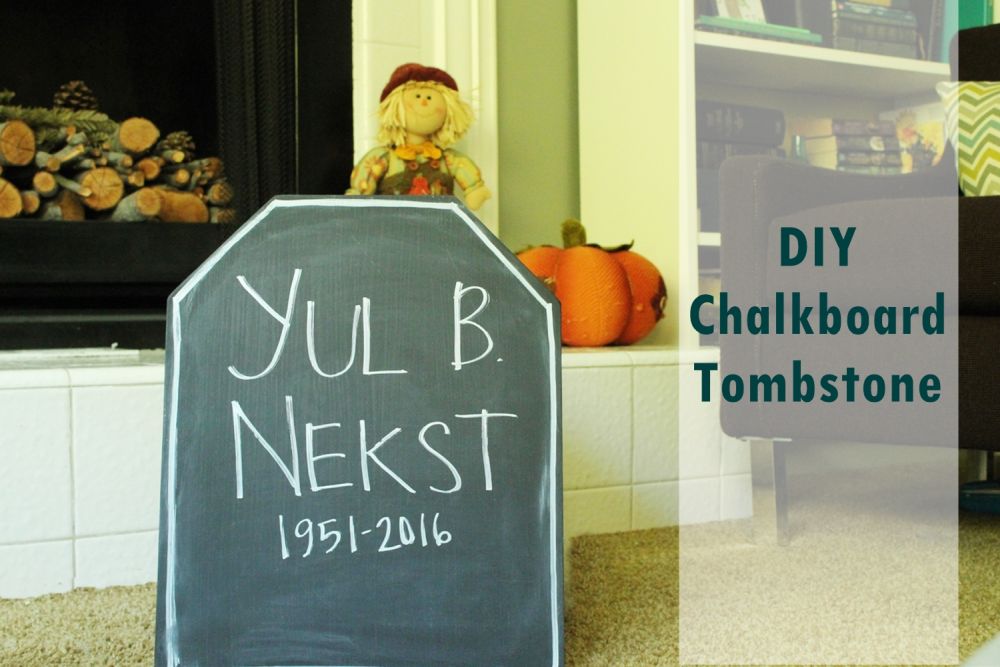
Grab a piece of chalk or your favorite chalkboard markers, and decorate your tombstone to your heart’s content.
The point of this exercise is to make sure your entire chalkboard painted surface is covered, fully and completely, with an initial and comprehensive coat of chalk.

Happy Halloween DIYing.
Step Nine: Decorate
Let the primer dry thoroughly.
A dry rag’s wiping may yield you somewhat chalky results (as seen here). The more you wipe, however, the cleaner it will appear. I wanted a “vintage” feel to this chalkboard tombstone, though, so I was brief in wiping off the seasoning base coat of chalk.

Begin by measuring and marking off the top corners of your rectangular plywood slab. The size can be whatever you want, really, and the corners should be symmetric but can be as flat or angled as you want as well. The example shows about a 3” triangle edge.

Use thick chalk or the side of a regular piece of chalk and color the chalkboard in fully, moving in one direction. Then, in the opposite (perpendicular) direction, use your chalk to color in that way.


When you’re satisfied that your chalkboard has been covered at least twice, wipe it off with a clean rag.

Yul B. Nekst…will you? Will you be next to create your own fun chalkboard tombstone? I hope so!
