When sealing coat has dried, grab your butcher paper map, a hammer, your nails, a bit of painter’s tape, and your plywood. It’s time to have some fun!
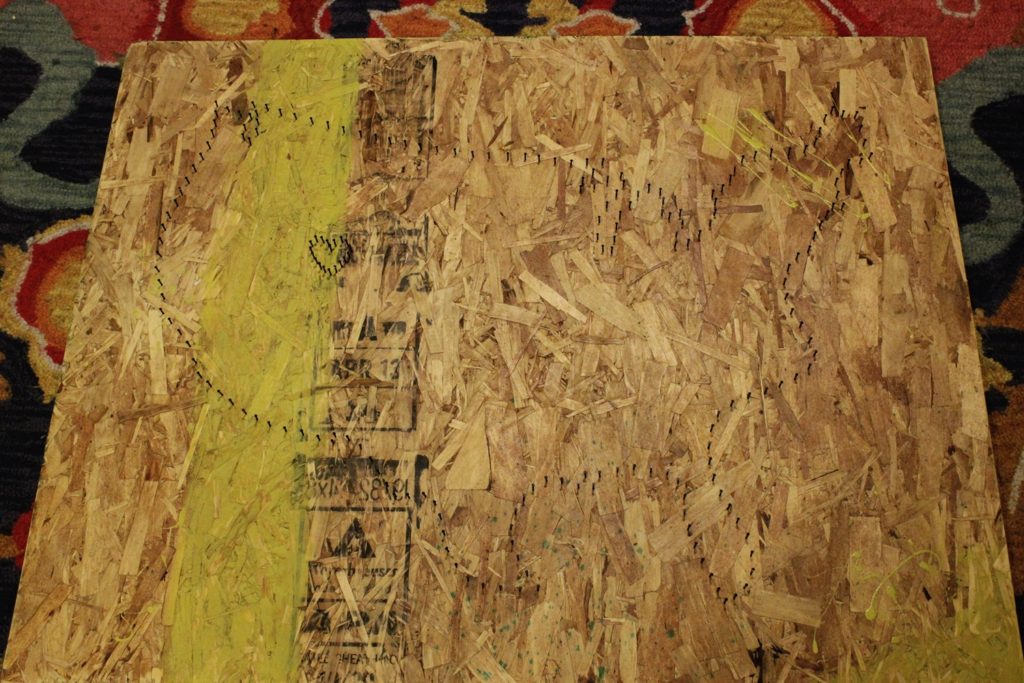
Pick a corner and start hammering. Decide on how far apart you want your nails, then be consistent as you work around the silhouette.

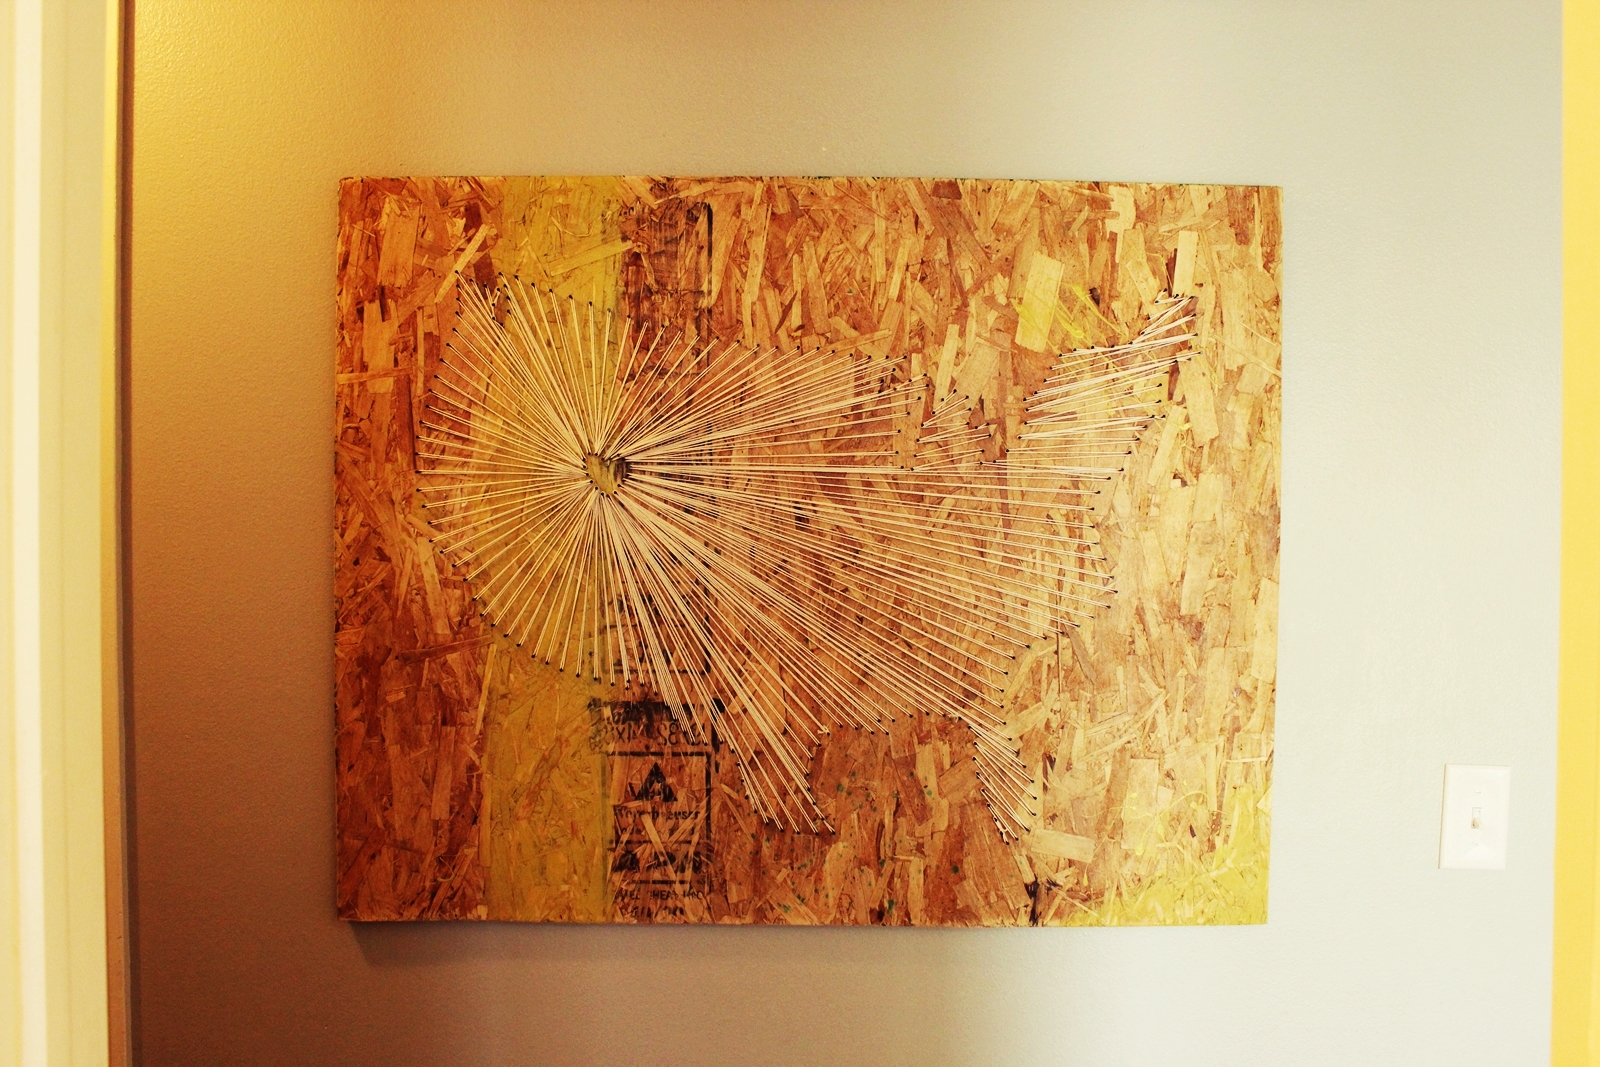
My USA string art is hung on the wall in our hallway. I love its wall accent large scale and the fact that, despite being a 3-dimensional piece of art, it doesn’t stick out too far.
How to Find String Art Ideas
- Google ideas
- Pinterest is a plethora of string art ideas
- Make your own by using the steps in this tutorial but mix up the shape. Perhaps you could use the shape of your home State or Province, your favorite country, an important location, etc.
What Do You Need for Nail String Art?
- A stencil for your shape
- Sturdy nails
- Cotton string
- Hammer
- Plywood
- Wall hanging hardware
String Art Pattern Ideas


DIY Level: Beginner/Intermediate
Materials Needed to Make DIY String Art
- Plywood cut to desired size (19/32” thick used in example, and sized about 2.5’ x 3.5’)
- Paint (optional)
- Minwax Polycrylic (optional) 1” or 1-1/2” nails
- Cotton string
- Butcher paper or newspaper (or any paper, really, that’s large enough to make a template)
- Heavy duty wall mount
How to string art – step by step guide
Step 1: Draw your map
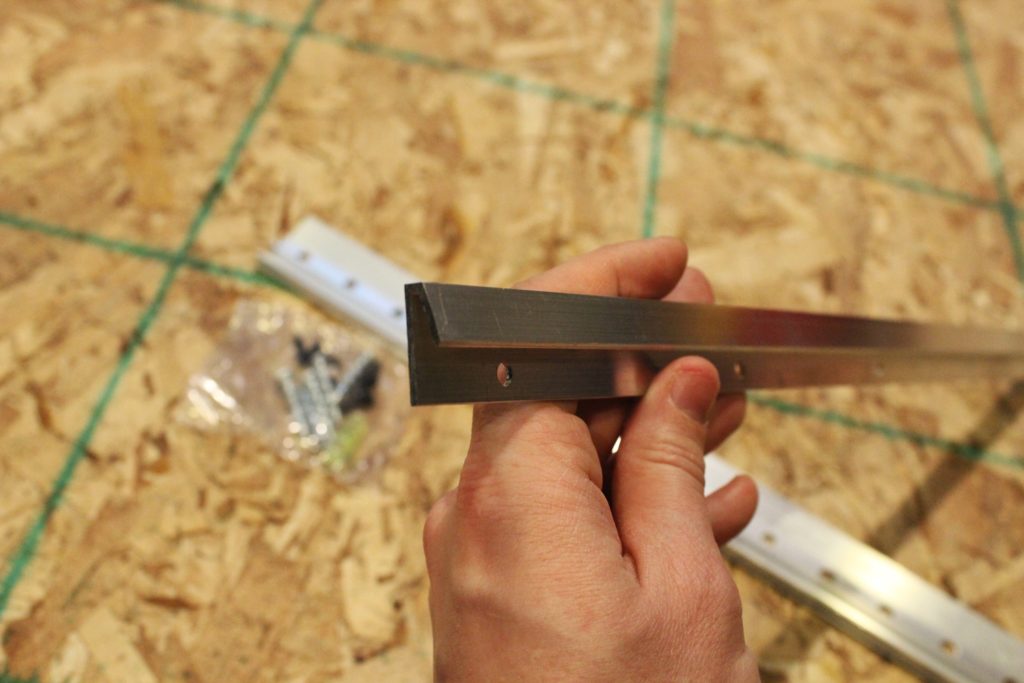
Center, then install the smaller mounting piece on the back of your plywood, as shown on the packaging installation instructions.
Grab a piece of butcher paper, cut to the size of your plywood, and a map of your string art subject.
Sand everything down. Remember that industrial style is anything but shiny-new-paint-ish.
The post DIY Map String Art With An Industrial Vibe appeared first on Homedit.

Step 2: Prepare your plywood
I just used a handheld screwdriver, and it was easy. Takes about 2 minutes.
Also, do your best to keep the exposed nail height consistent throughout. I recommend hammering each nail into the plywood about 1/2″ because that’s enough to secure it into the board but not so much the nail pokes out the back of the plywood.
Step 3: Add industrial touches (optional)


I established my “line” toward the central heart.
An off-center stripe can make for a great touch that keeps things from being too predictable.

Tie off string onto a nail. Don’t worry about keeping the string ends short at this time; you can trim them later. Just tie a square knot on a nail about halfway through the bottom section of your map.
Step 4: Seal the plywood (optional)

Let the sealing coat dry.
Choose the place you want to emphasize – where you live, or where you have fond memories – and hammer in a heart with nails. Here, you’ll want to hammer the nails fairly close together, because strings from all over the silhouette will be merging here. It’s a pretty big ratio, of silhouette nails to heart nails, so insert as many as you comfortably can.
Step 5: Position map onto plywood

Use a level to install the second piece of your heavy duty wall mount on the wall.
You can see where I started my stringing in this photo. It’s best to not start in the corner, because the halfway point will give you a better idea on how to allocate or distribute the nail usage in your heart location.
Step 6: Hammer nails around map silhouette

Loosely tape a few corners of your butcher paper map onto the plywood – just enough to hold it in place exactly where you want it.

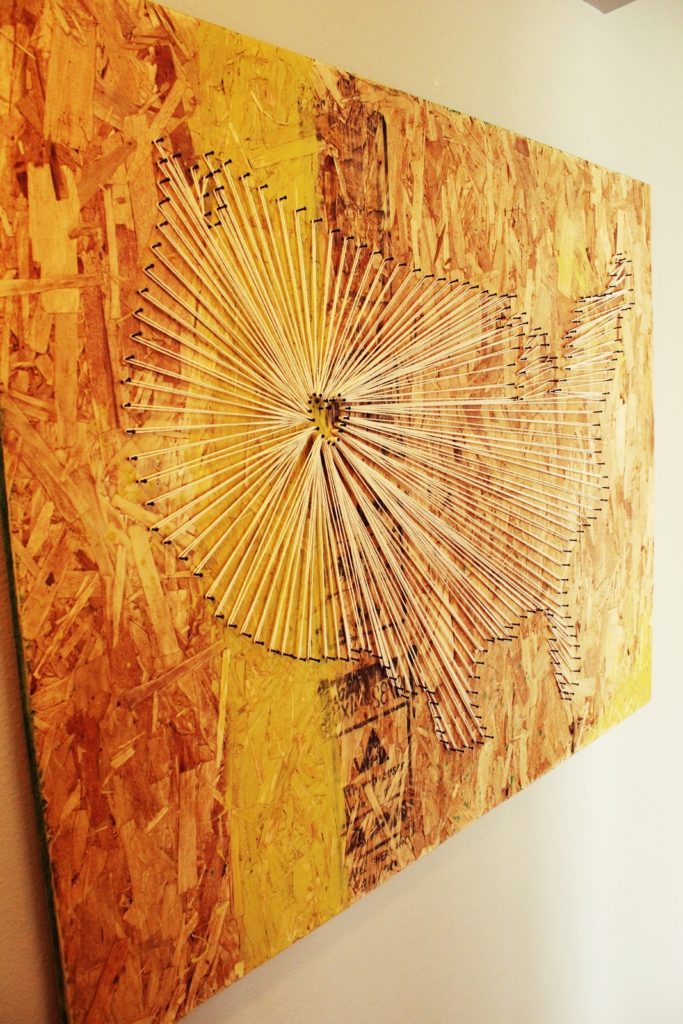
When completed, your map might look something like this. I fell in love with mine and its raw, industrial vibe. (The string is much more apparent in real life.)

A couple of tips for best results: Keep the nails going in perpendicular to the plywood; if one gets off somehow, use your hammer on the side of the nail to gently maneuver it back into place.
Looking for a unique handmade gift idea Or perhaps you’re in need of some great DIY wall art ideas for your home.

Step 7: Hammer focal heart
Depending on the map you’ve chosen, you may come to a part where there is no possible straight line from the perimeter nails to the heart. This happened several times for me, with my map of the United States. To keep the flow of the string art, I simply strung these nails together in a way that maintained the line directions toward the heart, if that makes sense.
If you’re looking for other string art pattern ideas aside from State shapes, then check out our list of the best string art ideas here! You’ll find everything from wall signs to eclectic art, and even inverted patterns!

Using this string line, I went back and forth on the nails, doing my best to maintain the line direction, always focused on the heart.
Step 8: Install mounting hardware


We hope you enjoy customizing your own piece of string art… and that you enjoy the low price tag on such a large piece of wall art as well.
Either way, this DIY map string art with an industrial vibe is sure to get you inspired! You can create virtually any shape or picture with string art, and a few simple twists can make the wall art completely custom to you and your life and style.
Your nailed map silhouette will look something like this.

Step 9: String it up
Here’s a tutorial for how to create a large map of string art with an industrial vibe over the weekend.
It might feel like you’re jumping the gun a bit, installing the mounting hardware before you’ve completed the string art project, but now is actually the easiest and most effective time to install the mounting hardware. Plywood is heavy, so I got a heavy-duty wall mount fixture (although you most likely won’t need one that holds 200 lbs, like this one shows).


Here is another example of the tricky spaces in the northeast section, where the string on perimeter nails wouldn’t have a chance of reaching the heart.

String it up to the heart and back to the same nail (only for the starting line). Wrap once around your perimeter nail, then go back toward the heart. String on the same nail, then come back to the nail next to your starting perimeter nail.

When silhouette and focal heart are complete, remove the butcher paper.
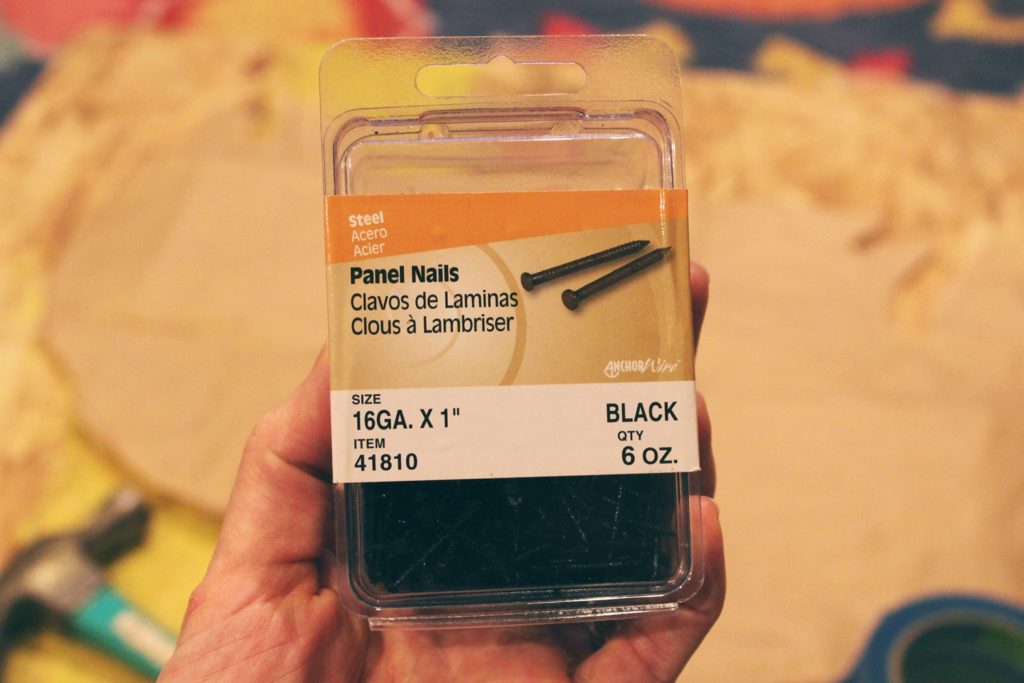
For nails, I used black 1” panel nails. For your reference: in total, I used probably 2/3 or 3/4 of a 6 oz. box.
Slather a coat of Minwax Polycrylic (or similar sealing agent) onto the plywood to give it a nice, finished look.


Paint a stripe or add some paint splatters to the front of your plywood to give it a roughened, industrial vibe

This often mean I had to tie off the string, in order to maintain the integrity of the line directions. Up close, this may seem like an odd move, but from a foot or more away, it’s the string directions that create the art here.


Go up and back, from the perimeter to the heart, like this. Keep loose track of proportions of the number of nails used; for example, when I had strung the nails about 10” from my starting perimeter nail (these were all strung on the same single heart nail), then I’d move onto the next heart nail. In other words, if you used 20 nails in your heart, for example, you’ll want to loosely divide your outer map into 20, and disperse the stringing accordingly.


Using the grid system (smaller grid on the smaller map that correlate to a larger grid on your butcher paper), draw the outline of your map on the butcher paper. Don’t worry about the details too much – they’ll be lost on the string art. Stick with the major silhouette points. When your butcher paper map is to your satisfaction, cut it out.
Continue stringing, making sure you’re distributing the strings around the heart in proportion to your perimeter nails. Also, it’s critical that you pull each string pass very taut, so the completed map will retain its shape.
Step 10: Tie off the last string and give your fingers a break

The tip of Texas, for example, ended up looking like this. See how the “western” strings don’t even go near the central heart, but they give the illusion that they’re headed that way? That’s what you’re after.
Step 11: Mount the string art on the wall
Since you started halfway through the lower section of your map, string this up to the lowest nail on your heart.


As per the installation instructions, keep the angled side facing up. This might look odd or feel counterintuitive, but it is this angled edge that holds the piece up; the piece will slide down right behind this edge.
Step 12: Enjoy your new wall art!
Some paint on the end of a stirring stick, for example, is a perfect vehicle for making a few discreet splatters, if you want.


Tip: Use cotton string because it will not stretch and lose its tautness like polyester or poly blend strings have a tendency to do. I had a ball of 475 feet of string and used probably half of it (my best guess) for this project.
With your plywood cut to the size you want, sand the front surface down. To achieve an industrial or rustic look, don’t worry about being too precious – sand the rough edges just enough to keep slivers at bay, but that’s about all. In this example, I kept the factory printing on the plywood, just sanded a little to mute it a bit.
