
This will add depth to the “veining” in your marble effect.
Mix up your fourth layer of Ardex feather finish in white, and apply a thin layer.
Materials Needed to Faux Marble For Countertops

Although it’s possible to wipe off the feather finish after it dries (as long as it’s not sealed yet), it’s much easier to do this while the mixture is still moist.
- White Ardex feather finish
- Grey Ardex feather finish
- Disposable mixing cup, mixing bucket, wooden paint stirring stick
- Putty knife and trowel
- Coarse, medium, fine, and very fine sandpaper
- Gloves (optional but recommended)
- Wet/dry shop vacuum
- 511 Impregnator
- Safecoat Acrylacq in satin finish
Faux Marble Countertop – step by step guide
Use painters’ tape to tape off the sides.
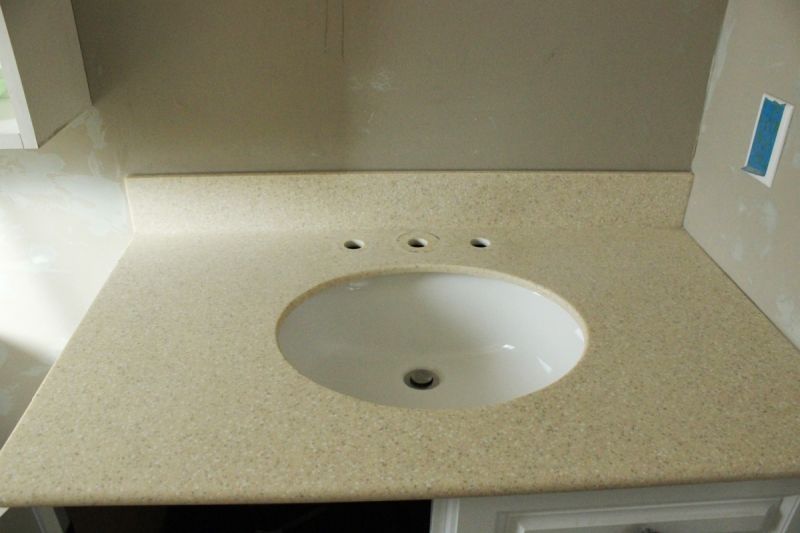
Step One: Remove fixtures
When you’ve reached a point that you’re satisfied with the faux marble appearance of your concrete countertop (remember, everyone’s preferences for veining are different – go with what YOU like), it’s time to sand it for smoothness. Use 220, 400, 600, then 800 grit sandpaper to get an ultra-smooth finish.

Step Two: Prep surface
Generally, the more you sand the area, the thicker the grey lines will become.
Be sure to wear a mask and protective eyewear for this step; the dust is going to get everywhere.
Faux marble is just how it sounds: lookalike marble. Often times, it can be made from DIY faux marble with paint and concrete, othertimes it can be factory made like porcelain faux marble tiles. In short, it looks like stone, but it is not.
Repeat the steps for applying and sanding the white top layer of feather finish.
Sand the countertop.
Step Three: Tape edges


Today we go through a DIY faux marble countertops tutorial that will allow you to make a beautiful interior in just a few steps. (Or, if you love the look of a regular concrete countertop, like this kitchen concrete countertop tutorial, that’s a lovely option as well.)
Step Four: Prep concrete
Faux marble can be made of a myriad manmade materials: porcelain tiles, painted countertops, and concrete.
After the electric sander has done the heavy lifting on the rounded edge, follow up with a piece of coarse sandpaper wrapped around the edge to smooth it out a little more.
Decide how much grey you want exposed.
Depending on how your original countertop is designed, you might be looking at a rounded front edge. My first idea for the rounded edge was to simply smear loads of feather finish onto the edge, from the bottom up to the flat countertop surface, and let it dry that way.

Once you’ve applied your feather finish to the flat top, remove the painters’ tape even before moving onto the side surfaces.

Step Five: Start applying concrete
It just simply means man-made marble. That is, it’s not sourced from the natural stone itself in nature.
On this side of the sink, we’ve ended up a little too blotchy. That will get another coat of white to try again for subtlety.
Step Six: Remove tape
Related: Give Your Kitchen a Facelift with the Best Epoxy Countertop Kit


This doesn’t look like marble, so it’ll be redone with another layer of white as well.

Pour a bit onto your countertop, then use your paintbrush to spread.


If you’re moving from a three-part faucet to a one-hole, you will want to fill in the two outer holes with concrete.
Mix the water and powder thoroughly according o the package instructions.

Pinch the corners to bulk them up a little more than the surfaces again. I found this easiest to do after the concrete had sat for a minute or two, when it was just barely starting to dry.
Pro Tip: Cover the sink surface with plastic grocery bags taped to the sides of the sink.
Step Seven: Edges
Then do the same with your thumb on the edge’s upper curve.
Pay attention to the directly of your lines; you will want to keep your trowel marks moving in roughly the same direction, similar to wood grain, so that if and when the lines are exposed, it looks similar to marble.
When you use an electric sander on the white layers, you’re going to be challenged in keeping the edges and corners somewhat white and crisp.
Step Eight: Let dry
You can paint faux marble by using a mix of concrete, paintbrushes, a sander, and sealant. For all steps, follow our tutorial.
After applying more concrete to the inner rim of the sink edge, curve one finger, hook it onto the rim so that the actual side edge hits between the knuckles, and gently run that finger all the way around the sink edge.
Step Nine: Sanding


Yes, faux marble is porous, especially since it’s made from a mix of manmade materials like concrete or paint. It is vital to use a sealant to protect it.

Faux marble countertops are the best way to get a luxurious, sophisticated stone counter without the cost.

This is a good illustration for why building up the corners and edges is a good idea – they are the most quickly sanded down.

Beef up the corners with white, though, so you don’t end up with a shabby chic version of marble after sanding.
This sealer will make the feather finish appear slightly darker than it was unfinished.

This way, you can watch the level of sanding (view the line where sandpaper touches the concrete) for most of the wrist rotation and adjust your sanding pressure accordingly.
Note: For your reference, on this small vanity countertop, I only needed about 2 cups of powder (plus water) for each layer.


Follow the instructions on the Ardex packaging. Measure and pour the powder into a large disposable container. I found a gallon ice cream bucket to work well here.
Let the grey-white (third) layer dry thoroughly.

Wipe the countertop thoroughly after each sanding.
Step Ten: Clean
Skip easily fading faux marble laminate countertops, and instead make a long-lasting concrete faux marble counterop instead.
As a temporary means of support (to hold the concrete in place while it dries), stick two pieces of duct tape underneath the holes to be filled.
Step Eleven: Second layer

DIY faux marble countertops can have stains removed easily by a distilled vinegar solution.
In fact, the more marbling you want, the more texture or lines you’ll want to leave exposed in this grey layer.
Note: Don’t worry about getting this layer perfectly smooth, as you want some grey to come through to create a marbling effect.
Pro Tip: When you find a spot you like, with the grey showing through in a way that really resembles marble, do your best to leave it alone.
The tape helps to keep the wall free from concrete splotches, but you have to remember to remove the tape while the concrete is still wet, or it will be a pain to remove.
To get scratches out of faux marble, you can simply buff the area and patch up with the same process outline above in order to create a faux white marble countertop.


Follow the directions on the bottle – let it sit for a few minutes, then wipe off any excess with a clean, white towel.
Beef these up, and you can always sand them down later.

Step Twelve: Clean up edges
Clean the countertop thoroughly with some sort of degreasing cleaner. Let it dry.
Repeat all the way down the rounded edge.
Let the first layer of white feather finish dry for at least 24 hours.

Wipe off the walls if you opted to not use painters’ tape for protection.
Vacuum up all the dust. It’s everywhere.
Wrap a piece of coarse sandpaper around a sanding block and use for corners, edges, and any places that you feel need a little more control and care in sanding.
Step Thirteen: Let dry
You don’t need to sand the very last coat, but you can if you’d like.


Step Fourteen: Third layer
Wipe off any excess while it is still wet.
Can you see how marble veining might appear when white feather finish is applied on top of this and then sanded down?
Note: Because this is a bathroom, where toothbrushes and toothpaste abound, we recommend a food-safe, non-toxic sealer, such as this SafecoatAcrylacq.
Start anywhere on the countertop you want, and begin troweling on the concrete in smooth strokes. If you start on the top of the counter, cover the entire flat surface before moving onto the sides because the Ardex feather finish will start to dry fairly quickly, and then you can’t smooth it out anymore.
Remove sink faucet and fixtures. (Check out this article on how to remove and install a bathroom faucet, if you’d like.)

After you’ve completed your coats of 511 Impregnator, it’s time to seal your vanity countertop.
No matter where you’re at with your home – even in the midst of a bathroom renovation, with the vanity itself under construction– you can start to get a feel for a high-end bathroom transformation just with this faux marble for countertops alone. We hope this guide served you and your sophisticated stone endeavors!
To create a subtle marble effect with Ardex feather finish, I recommend doing five or six layers. You’ll need both white and grey Ardex. Use white for the first layer, so your baseline is white. It likely won’t show through after five or six layers, but on the off-chance that it does, white is a good way to go.

Step Fifteen: Fourth layer

Apply the impregnator in smooth, easy brush strokes.
This is another place to add in more concrete than what you’ll actually need, so you can sand it down to a smooth surface later.
Apply more concrete than you’ll actually need to the edge corners.
The third layer can be a mixture of white and grey powder.

The goal is to create a smooth surface without sanding all the way through to the solid surface, although it’s bound to happen with this first layer.


Reinstall a faucet onto your new countertop, and step back to admire the new look. Very luxe.
Use a trowel or putty knife to spread the concrete on side surfaces.
Let this layer of grey dry thoroughly, then sand lightly.


Keep your space well ventilated.
In order to faux marble, you’ll want to gather key items: concrete, paint, a sander, and a clean surface. From here, you’d follow a series of steps to sand, and paint the surface into a white marble lookalike.
Below are all the materials you need for faux white marble countertops.
Measure half of that powder amount for water, and pour the water into your powder bucket.
Repeat as many times as you’d like, actually – it doesn’t hurt anything to add layers to cover up mistakes.
Step Sixteen: Sanding


Mix up your grey powder in the same way.
Step Seventeen: Sealing
This “veining” next to the sink itself has turned out nicely.
Pro Tip: When you go to sand the concrete, thin layers at the corners will disappear faster than you think, leaving you with very little concrete coverage on the corners.
The post How to Create Faux Marble Countertops appeared first on Homedit.
Similarly, apply enough concrete to the rounded edge that there are no gaps, then curve your thumb and run it all the way down the lower curve of the rounded edge.
You will not be sanding this grey-white layer.
This will help to keep your drain clear of the copious amounts of dust that occur with the sanding you’re about to do.


Use your finger to smooth out the corners where the countertop meets wall, as these joints are hard to sand smooth.
Trowel on a thin layer of grey feather finish.
You will want to apply the feather finish around the inside rim of your sink (wherever the solid surface countertop is).
It’s important when working with acrylic to keep a wet “edge” to your brush – the sealer dries relatively quickly, and brush strokes will show when your brush starts to get dry or you are trying to apply too little of the acrylic.


Spread it on thinly, with some texture.

Be sure to gently sand with very fine (800 grit) sandpaper between each coat of acrylic.
Step Eighteen: Light sand

Use the sandpaper piece in this same technique around the lip of the sink.
Note: This is really a subjective decision – if you want less grey, add thicker layers of white. If you want more grey, make your white layers thin and sand down more to expose more grey.
Step Nineteen: Install faucet


Faux marble countertops are made from applying concrete and paint on the surface of a counter. It comes from repeating layers and sanding the layers down to make a marble look finish.
Frequently Asked Questions (FAQ)FAQ
What is faux marble?
Clear out the center faucet hole, if any concrete fell in or adhered to the side.
What does faux marble mean?

How to paint faux marble?

Is faux marble porous?
The best way to sand a rounded lip is to gently place the sander on the underside of the rounded edge, then rotate the sander up over the rounded edge until it’s on the flat (top) surface of the countertop.
What is faux marble made of?
Note: One thing to remember is that rounded surfaces are harder to sand than flat surfaces, so the smoother you can get the wet concrete, the easier the sanding steps will be.
How to faux marble?
Let the impregnator dry completely (your countertop will appear splotchy and darker while drying; don’t be alarmed), then repeat another time or two.
What is faux marble countertops?
Before you seal your countertop, you should apply two or three coats of 511 Impregnator, which will soak into the concrete and help to keep it stain resistance from the inside out.
How to remove stains from faux marble?

How to get scratches out of faux marble?

Faux Marble Countertop: Conclusion
Then pick up the sander, move it down a few inches on the underside of the rounded edge, and go again.
Grab your coarse (80-grit) sandpaper, and get ready to sand down the first layer of feather finish.
