You can build your own planters by following some simple steps. Before beginning, prepare the materials you will need. You will need concrete, a mold, and some pebbles. Once the materials are prepared, mix the concrete according to the instructions on the package. Once the concrete is mixed, scoop it out and set it in a mold. You should grease both the inside and outside of the molds. You can add more concrete to your molds or use pebbles to weigh down the finished planter. Finally, tap the concrete in place to remove air bubbles and smoothen it out.
Materials required for diy planters
If you are looking for a unique way to decorate your outdoor space, you can try making your own DIY planters made of concrete. These pots can be used to hold air plants and they are low maintenance. You can also try adding drainage holes to your planters using PVC pipe. To add the pipe, simply measure, cut, and oil it before adding it to your planter. Then, pour concrete around the pipe.
Alternatively, you can purchase a mould for concrete planters. This will help you to get the right shape and size of your planter. You can use a rectangular or a circular container. If you don’t want to spend money on a concrete mould, you can try using cardboard. Plastic, styrofoam, and glass will also work well.
For large concrete planters, you will need to purchase a larger container. You can also reuse old buckets. You’ll need at least three inches of concrete for each planter wall. After the concrete sets, it should be sanded lightly to get rid of bubbles. Once the concrete has cured, fill the planters with succulents or low-growing plants.
If you plan on planting flowers or herbs in your concrete planters, you should be aware that the mix is porous and will release chemicals into the soil. You should avoid mixing concrete with soil because the concrete can raise the pH level. If you want to keep the soil healthy, you must make sure that you water your pots with a hose before you plant them.
Before pouring concrete into your mold, you should first make your mold. The easiest type of mold is one that has smooth sides and a straight opening. Next, make a smaller mold that will be the actual cavity of the concrete planter. You should leave about a quarter inch of space between the large and small molds to make them easier to remove from the concrete.
If you’re looking for a unique way to create a DIY planter, concrete is a great option. Concrete is available in many different forms and can be purchased online. You can even purchase a mold from the dollar store and make your own concrete planter. Depending on your specific needs, you can choose different shapes of concrete and use it to create the perfect planter.
Besides cement, there are other materials you will need to create concrete planters. You can add peat moss or Perlite to create a textured finish. If you want a cement planter to be sturdy, you can also add water to the mix. Just make sure you do not add too much water or the mix will be too runny and it will take longer to dry.
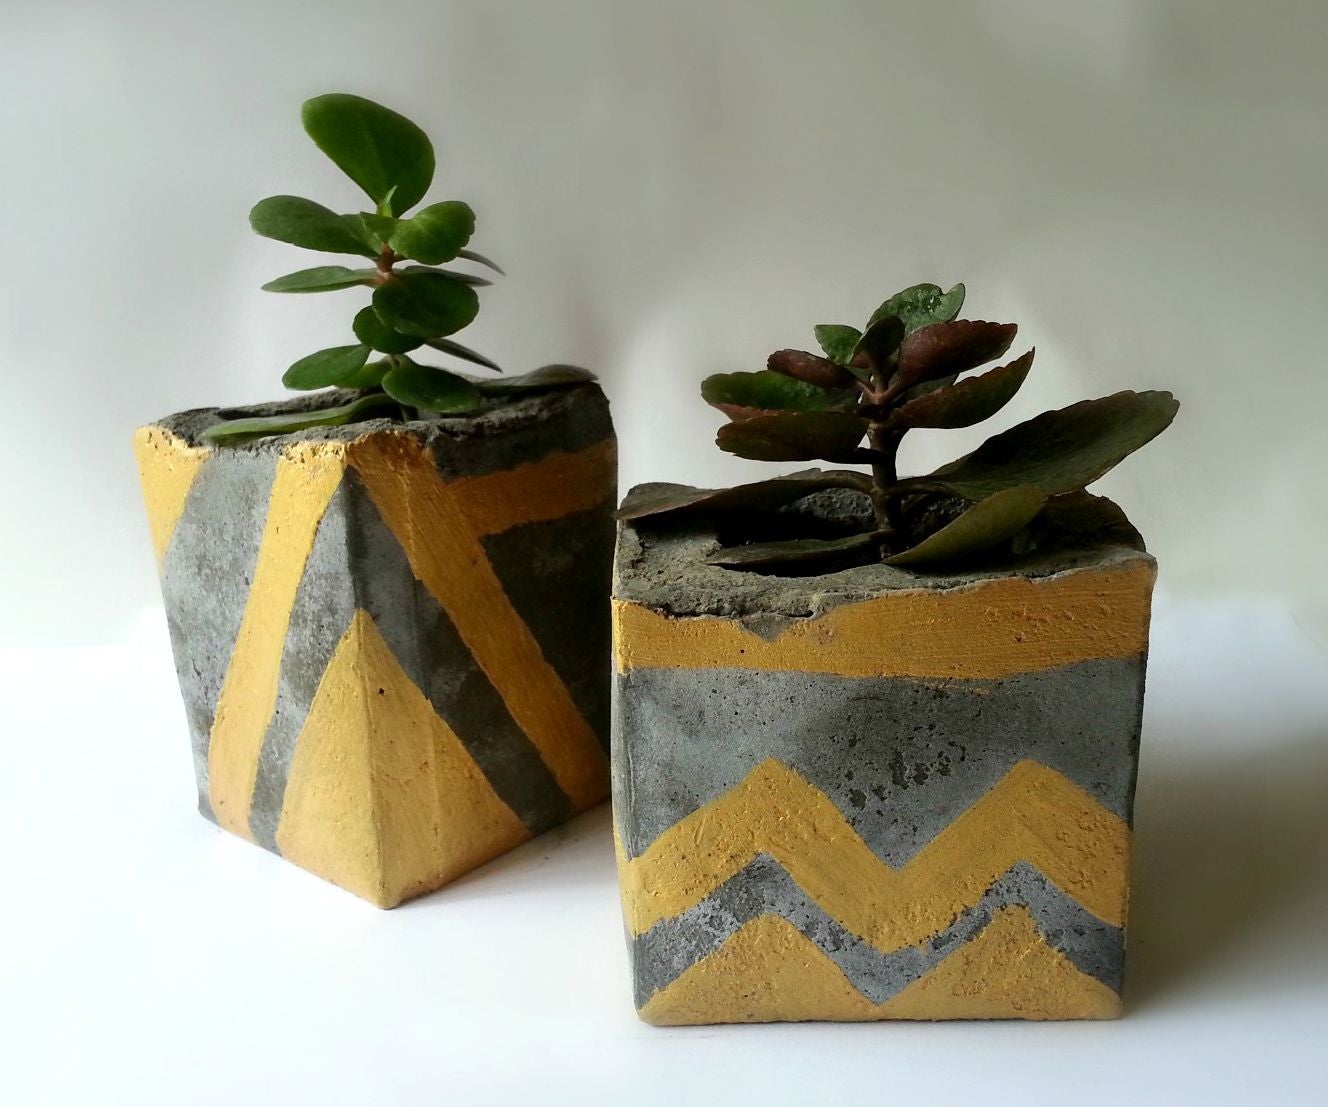
You can also add color to the concrete. You can paint the entire planter, or just one side. Adding color can make the planter more unique. Once the concrete has dried, you can then add a sealant to protect it and enhance the color.
Patterns for concrete planter pots
If you want to make a statement with your garden decor, concrete planter pots are the perfect option. You can apply any pattern of your choice, from Aztec prints to playful animal prints. This material also lends itself to a rustic, farmhouse look. You may need to do some trial and error in order to find the right shape for your concrete planter pots. Luckily, you can still make them yourself – you just have to get creative!
First, you will need a mold. The easiest molds are those that are straight up and down with a slight taper at the opening. Inside of this outer mold, you’ll place a smaller mold, which will form the actual cavity of your concrete planter. Make sure to leave about 1/4″ space inside your mold.
Next, prepare the concrete. Pour it into the mold and use wooden dowels to anchor it. Next, place a piece of cardboard in the center. After a day or two, let the concrete set. Then, fill it with your plants. If you’re working with a smaller mold, you can weigh it down to speed up the process.
Concrete planter pots are a durable choice, but they may not always be in style. Using a little creativity, you can add some color and decorate it to suit your taste and decor. If you’re not into painting concrete, consider using faux concrete to create a faux concrete effect. A faux concrete pot can look very realistic and last for years!
You can use concrete planter pots for most plants. Some concrete pots, however, require a wet curing process. To ensure that the cement isn’t too dry, you should mist it with water or wrap it in plastic. A good mix ratio for concrete and sand is 3:1 or 2:1. If you want to make larger pots, increase the amount of cement in the mix and add more sand. Also, you’ll need to use more sand if your concrete planter is narrow-walled.
A concrete planter can be created using leftover materials from your home improvement projects. You can use Quikrete 5000 Concrete Mix and reusable molds made of PVC pipe, vinyl floor mat, or trim board. You can also use mixing buckets or plastic bottles to make the cavity in the concrete planter. You can also use a cardboard planter as a mold. In this way, you can make a miniature planter for a gift.
Some planters are made with a variety of designs. These can be coordinated to create a unique look, or you can use the same color for all of them. Concrete planters can also be customized by engraving your choice of design. They’re not only beautiful but also durable, and you can use them outdoors or indoors.
To create a concrete planter with a unique shape, you should first decide which type of concrete planter you want to create. Fortunately, making your own concrete planters is simple and inexpensive. A free template is available online that makes a cardboard mold. Once you’ve cast the concrete, you can use acrylic craft paint to create a matte finish. Or, if you’re feeling adventurous, you can also use powdered tempera paint to create an ombre effect.
Techniques for making drainage holes in planters
Making drainage holes in DIY planters is easy, but a few techniques are required to prevent concrete from settling into the voids. Firstly, prepare the interior container by placing it in an outer mold. Next, set the inner vessel on the drainage hole form. Tap the inner vessel occasionally to make sure that it settles in properly. Then, pour the concrete around the drain hole.
Before starting drilling, mark the areas where you would like the holes to be drilled. This will help you to place the drill bit in the right place. It is also helpful to use water to cool the drill bit and prevent it from overheating. Repeat until you have drilled a clean hole through the fiberglass.
Creating drainage holes in DIY planters is easier than you might think. All you need are some basic tools and a few minutes. First of all, you need a small hole drill bit that can fit inside the concrete. The diameter of the drill bit should be a minimum of 3/8″ – a little more for larger planters.
For larger planters, make sure that there are enough drainage holes in the bottom. These holes should be a quarter-inch to half-inch in diameter. This way, the growing medium will be able to drain without having the soil sucked out. Moreover, they will help aerate the soil.
Another important thing to remember is to wear a dust mask when drilling. This will protect your eyes from the particles and dust that are inevitably present in the concrete. You can also keep a pair of tissues or an old cloth close by to avoid dust accumulation. Finally, do not forget to clean the holes well.
Concrete planter molds come in a variety of styles and materials. For larger planters, you should choose a wood form or a plywood mold. For smaller ones, you can choose melamine forms, which are smooth and flexible. A smooth concrete form is easier to work with and less likely to crack.
There are two different methods for making drainage holes. One method is to use a saw. A saw with a sharp blade will make a fine cut, while the other is to use a hand drill. Ensure that the blade is at a 45-degree angle.
Auto Amazon Links: Could not resolve the given unit type, . Please be sure to update the auto-insert definition if you have deleted the unit.
