Applying lacquer is similar to a standard wood stain. Instead of using gloves and a cloth, I used a paintbrush. Be sure to use one you will be ok with throwing out. The lacquer will not come off of the brush so it is done with. Set the piece you are working with on something other than paper. The lacquer is sticky and will have the paper stick to the piece. I used a metal sheet I had in my garage, no sticking.

Materials needed to make a wooden pencil holder:
- 4×4 piece of wood
- Miter saw
- hand drill
- wood bore
- sandpaper
- lacquer
- paintbrush

How to craft this wooden pencil holder:
Step 1: Measure and mark where the holes should go
But, the clutter and mess that is their crayons and other art supply needs is overwhelming. I decided to create a wooden pencil holder that would allow function, organization, and visual appeal.
Once the smooth surfaces were covered I shoved my brush in the holes to make the holes have a slightly glossy look as well. There was a puddle in the holes, but with them being somewhat small a little pooling of lacquer wont be noticeable. Just like with a standard stain, to know if the lacquer is dry or not check by how it feels. If there is still a sticky feeling to it, it is not dry yet. Once dry, you can do another coat if you want.

Trying to find the balance in function and aesthetic is a constant struggle for me. Add kids and their “stuff” into that and it feels like a loosing battle. I try to encourage my kids creativity, allowing an art table to be there for them when inspiration strikes.
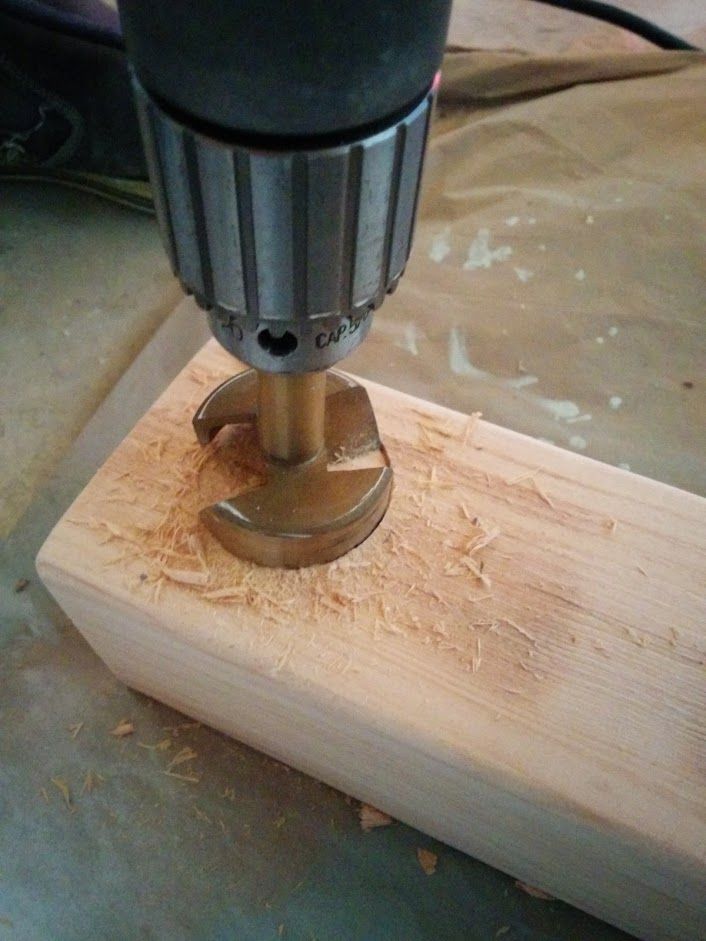
Step 2: Drill the holes
This is how shiny it looked right after one coat of lacquer. It does dull a little after drying. I only did one coat, and it gave me the small gloss effect I was going for.

Dipping the brush in the mid gloss lacquer I chose. Then brushing it on, going from one side to the other with the grain of the wood. You can go through with the brush a few times over one spot.
Step 3: Sand the wood and apply the lacquer


I planned to drill the holes into the wood by using a standard hand drill with a wood bore on the end of it. So taking the largest wood bore and measuring and marking where the holes would go. Making sure they were centered and evenly distributed on the wood. I ended up measuring out 9 holes. More than enough.
The post Rustic DIY Pencil Holder – A Beginner Woodworking Project appeared first on Homedit.

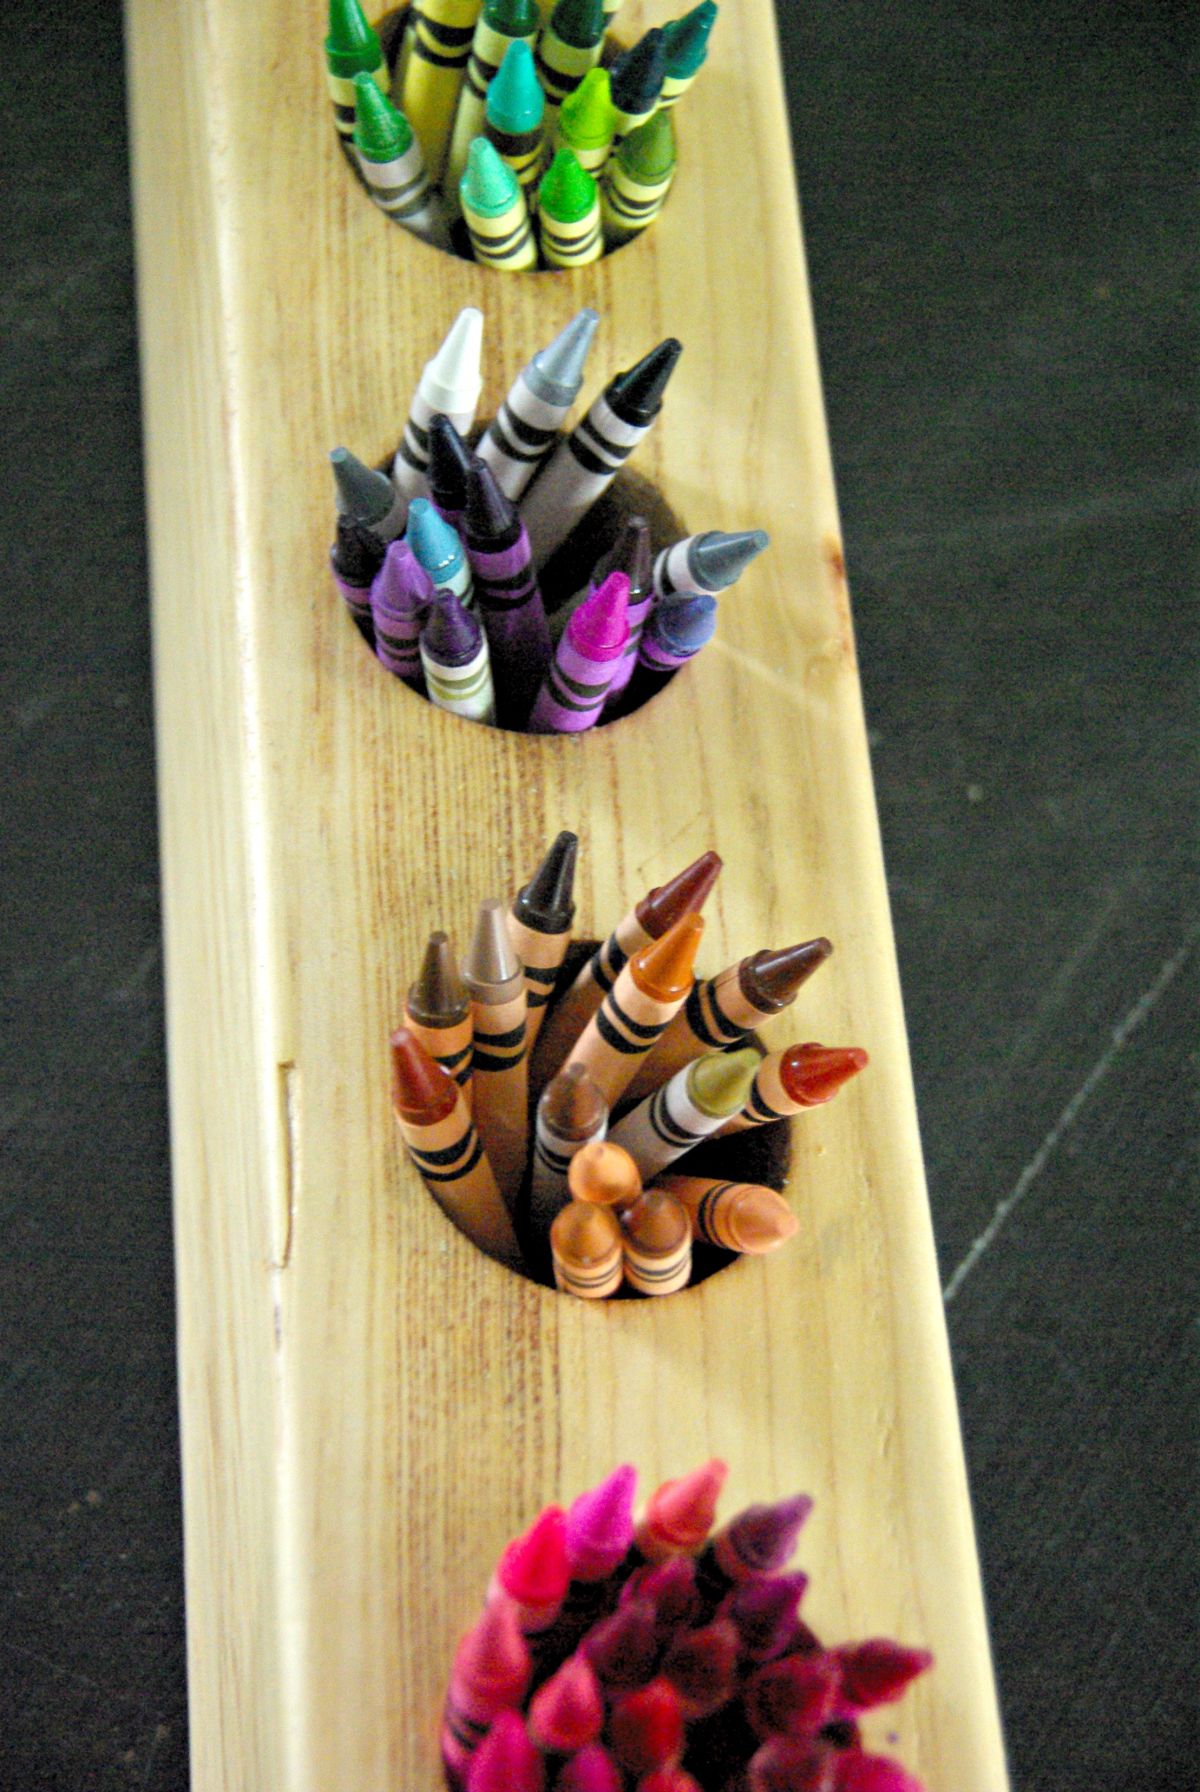
This would work for any workspace, kid or not. As of right now the crayon colors being separated is even helping my kids keep everything neat and organized. A game of sorting, we will see how long that lasts. But, just putting them in here cleans up space instantly.
Like I said, really simple. Just time-consuming.

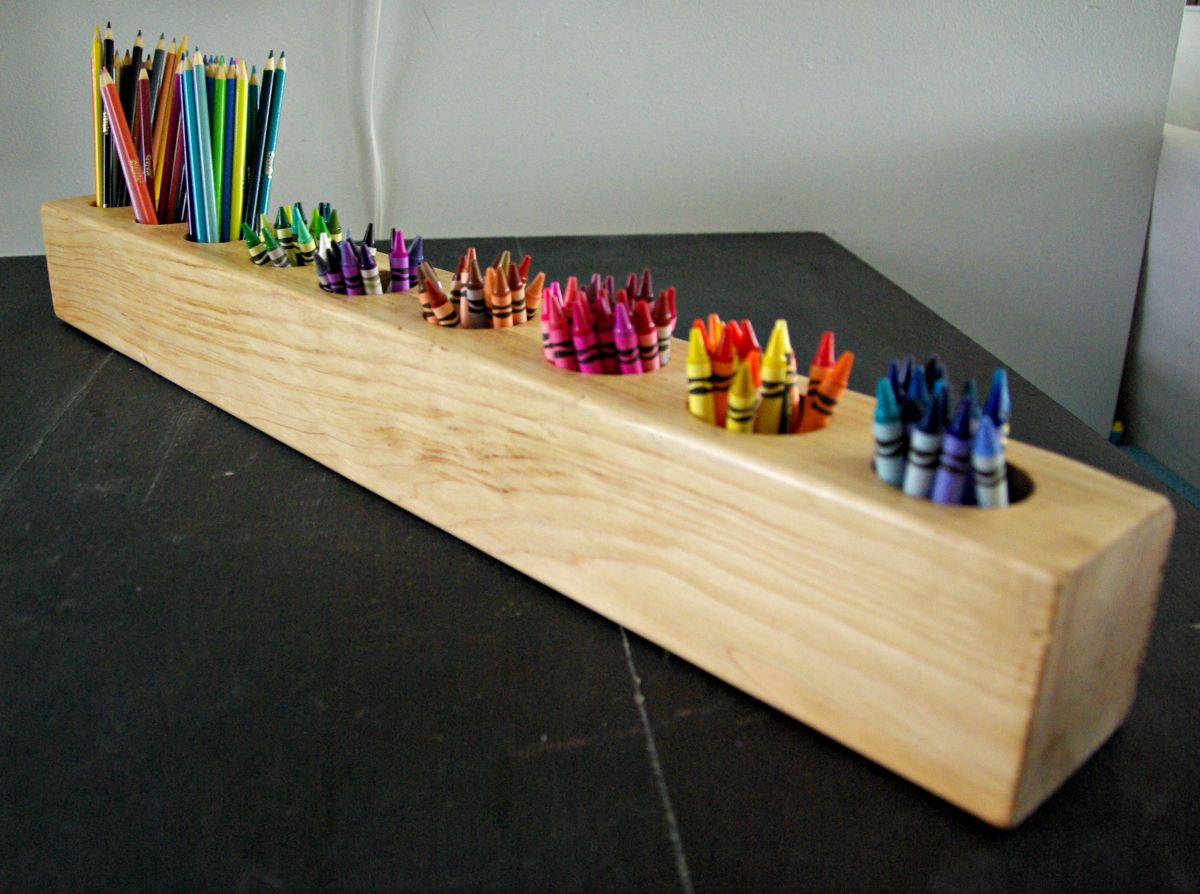
I purchased a long 4×4 wood. It is a great and bulky square, perfect for little crayons to fit in. If you are wanting to put pens or other larger items, getting a 6×6 would be more visually appealing. With my kids and their little supplies and hands, a 4×4 size was perfect. I cut it down slightly, to be about 2 feet long. This allows for it to be almost the whole length of my kids art table. Allowing any of the crew to reach for crayons.
Step 4: Fill it with crayons

I added my kid’s crayons and colored pencils and it was done. I was able to have it hold 100 crayons and 30 colored pencils. A big amount for such a streamlined piece. The thing that I adore about how this turned out, is even though it is for the purpose of holding my kid’s art supplies. It works for an adult space. It makes even their art table feel official and formal. I can also use this later on down the road when my kids are done with their obsession that is coloring.
Taking the standard drill and setting it in the center of my marks, I push down with the end of the wood bore. This turns slowly and drills into the wood. It is a simple enough task, just slow going. Drilling in the 9 holes took about 2 hours. With breaks for my achy arms. You have to put a fair amount of muscle into the drill to make sure it is pushing through the wood.
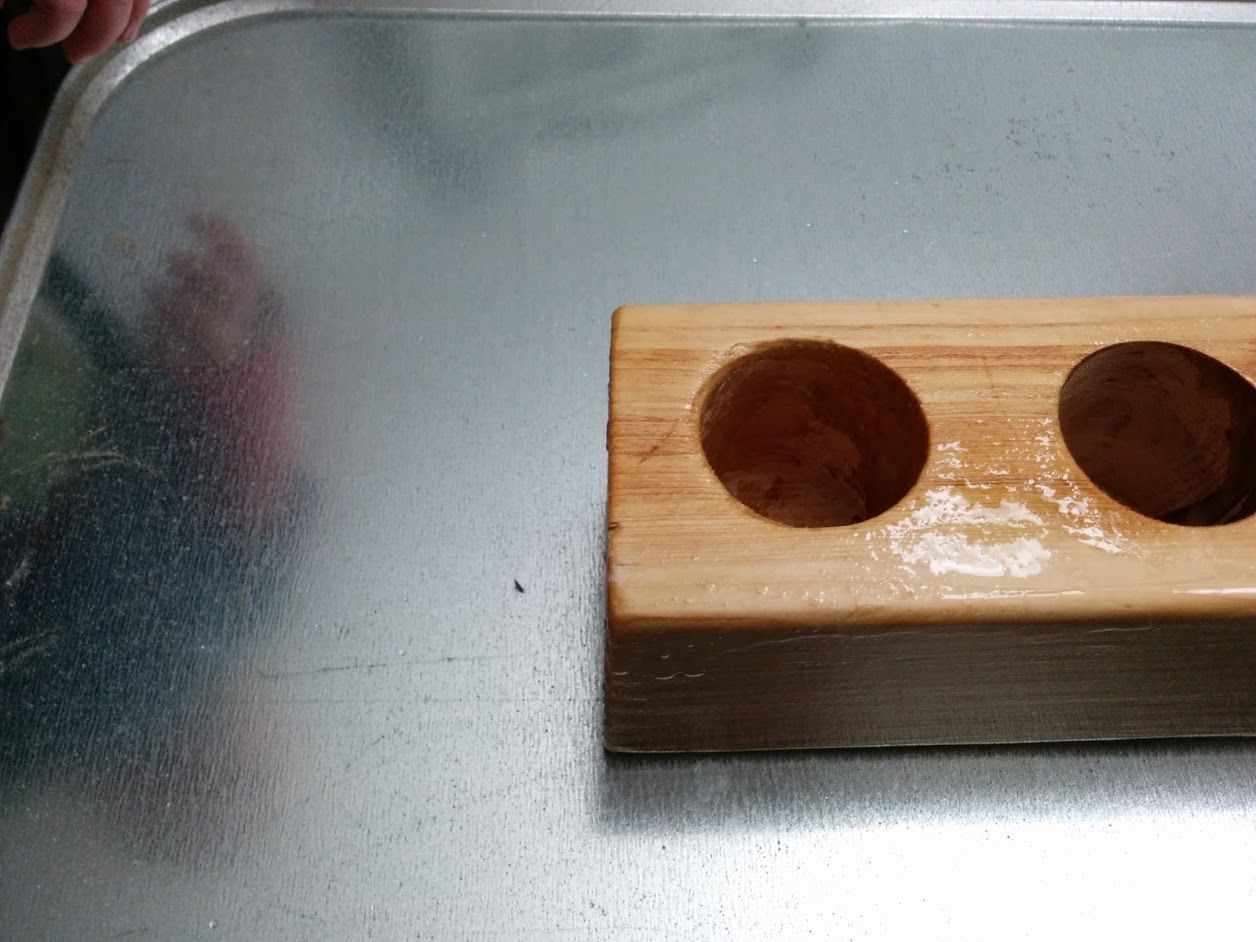
Once I had all 9 holes in. They go almost to the bottom of the wood, so probably about 3.5 inches deep. I had intended on staining this dark, I love a dark stain. But the wood grain of this was gorgeous. So instead I spread a lacquer on to make the wood and the small details shine.

